Getting Started with SharePortals
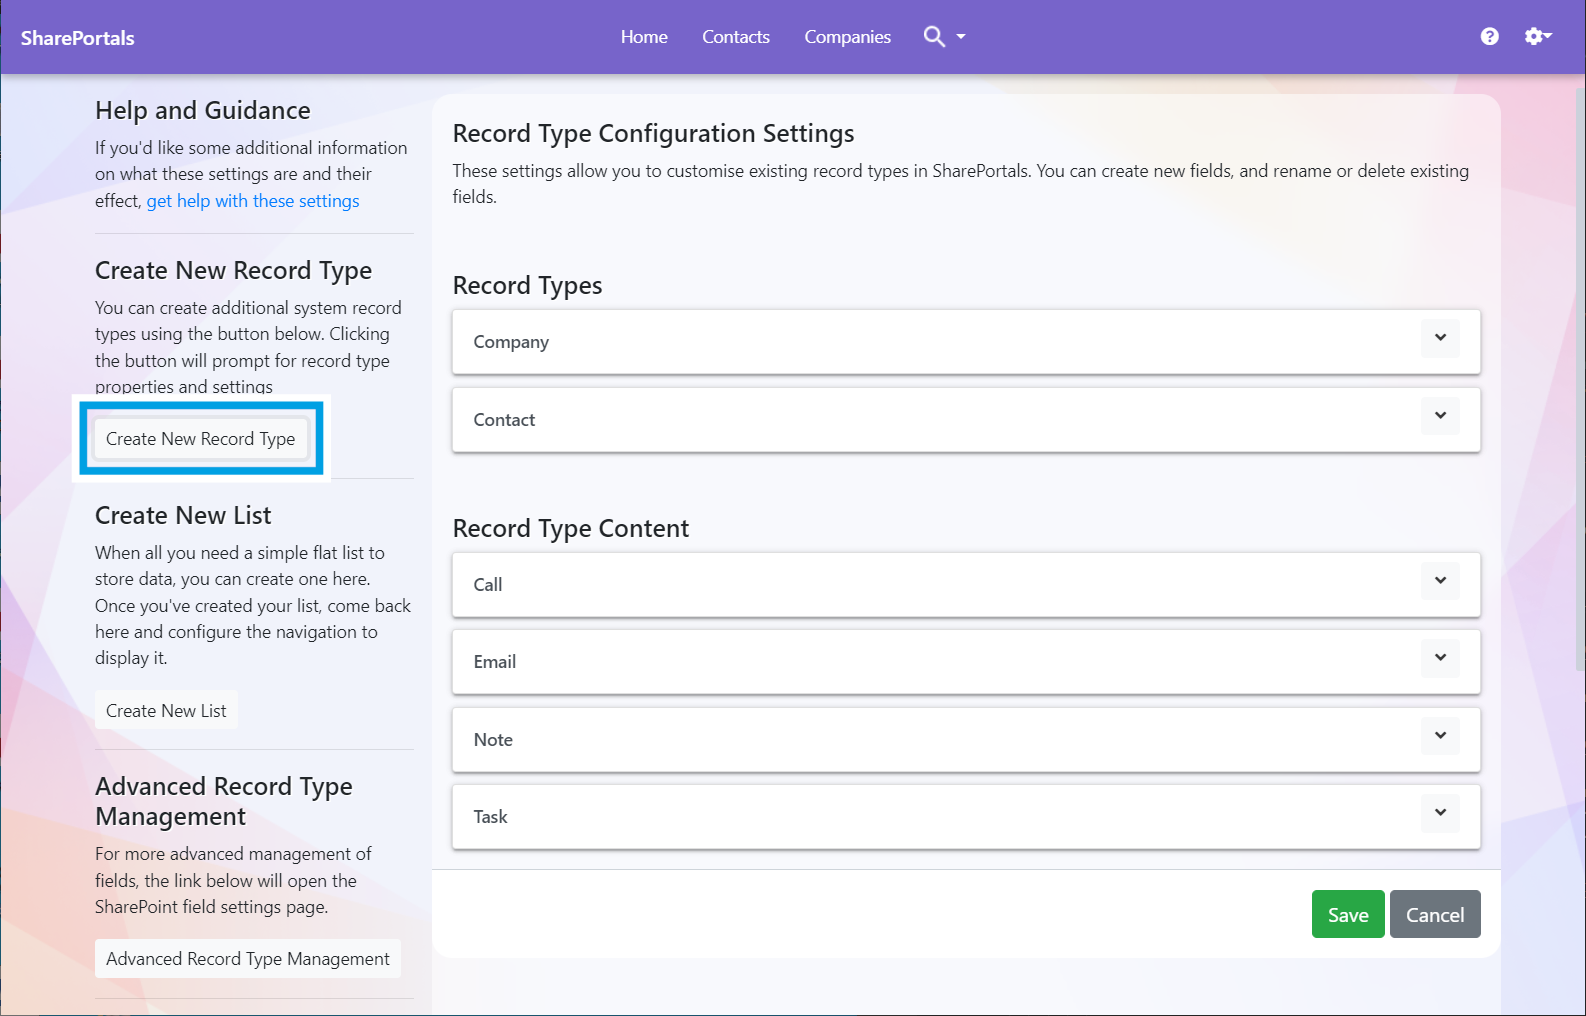
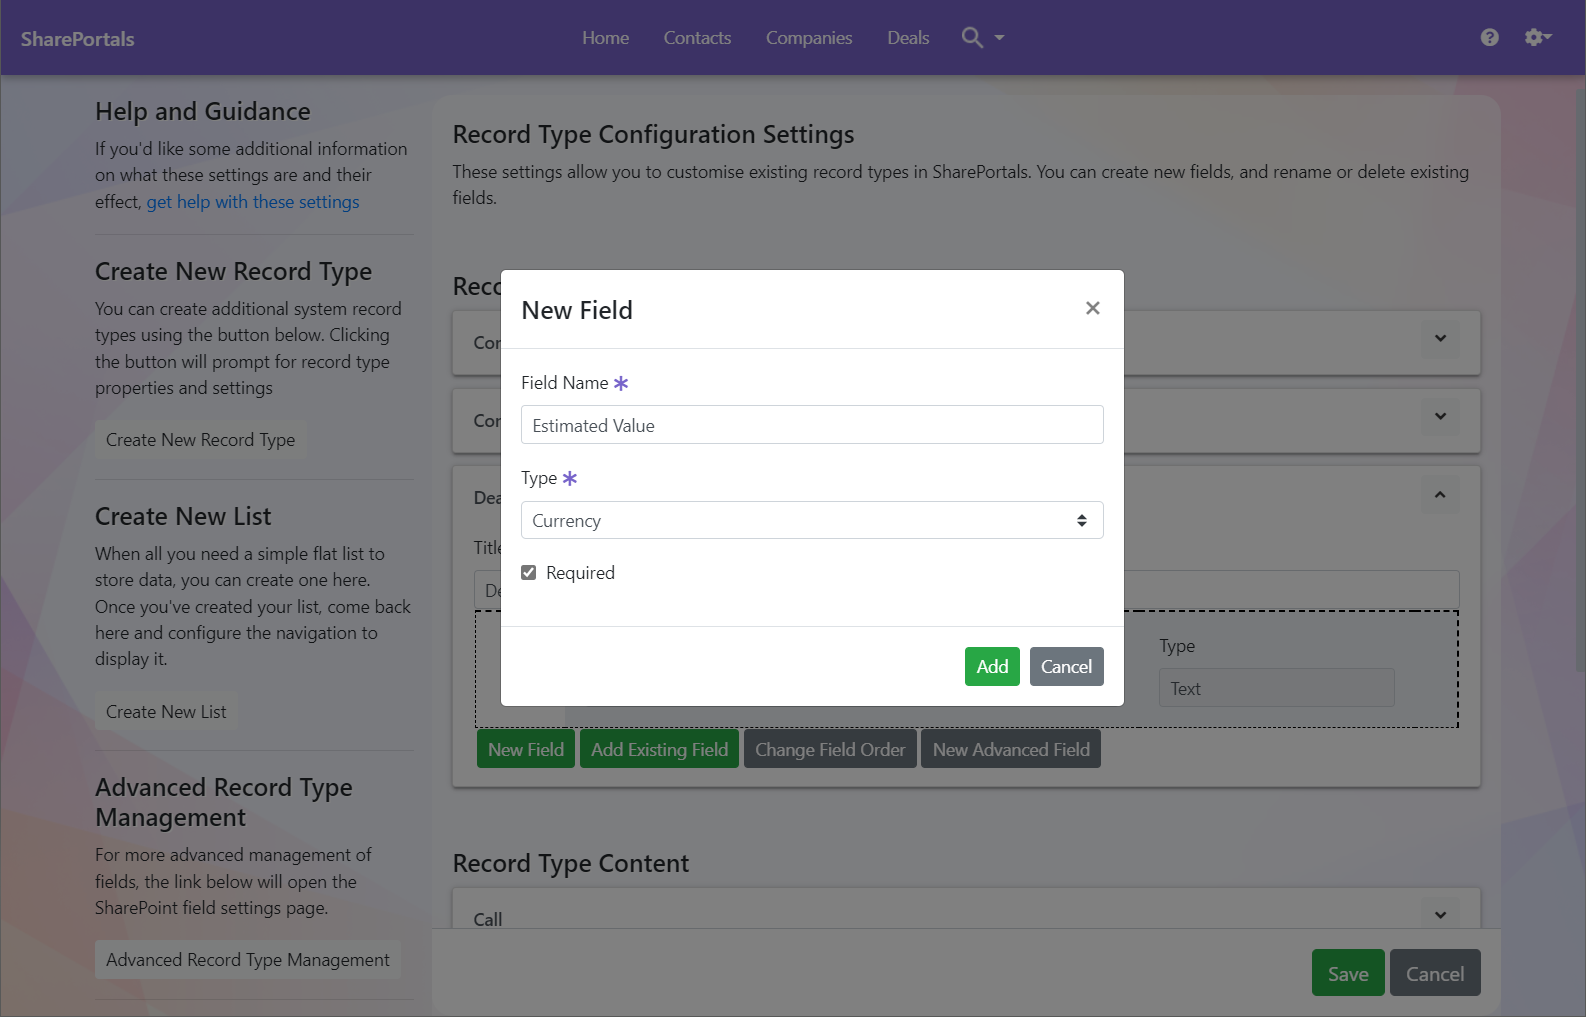
Create new system Record Types or modify existing ones.
- Go to SharePortals | Application Settings | Record Management | Create New Record Type:
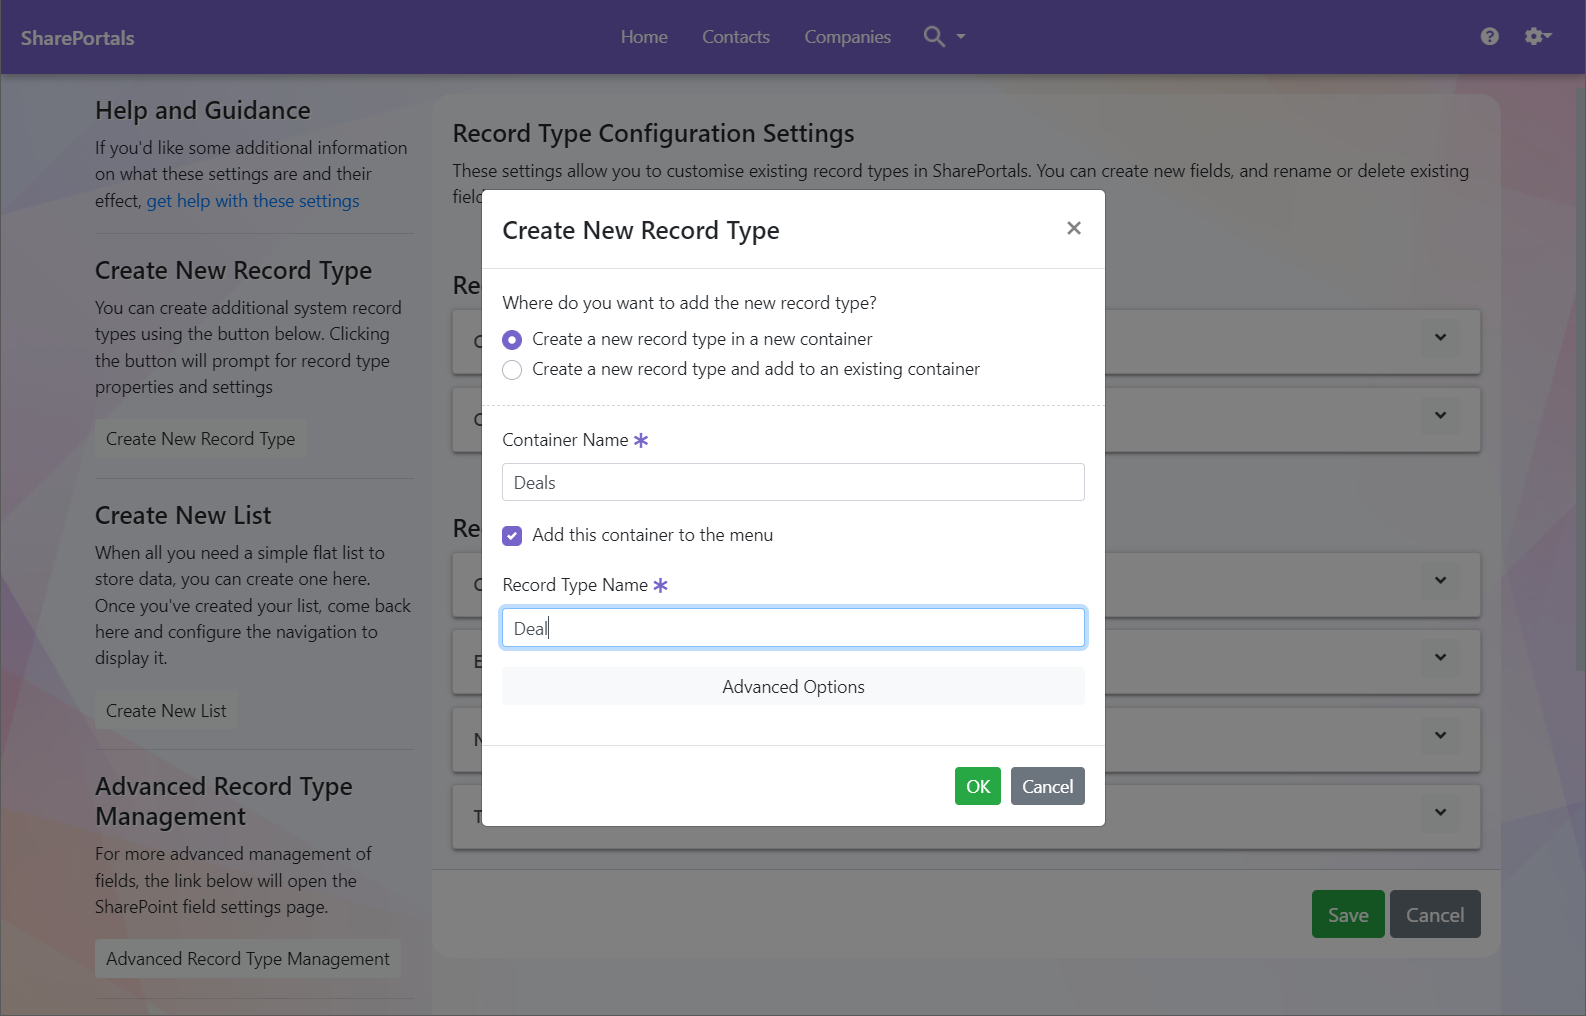
- Specify a name for the record container and a name for the record type. Click OK.
- Expand the new record type and add your fields. Create your own, use existing fields (SharePoint Site Columns)
Note: To Change the order of your fields, save newly added Fields before selecting this option.Warning Grey Buttons on the main Record Management settings screen are for advanced usage only.
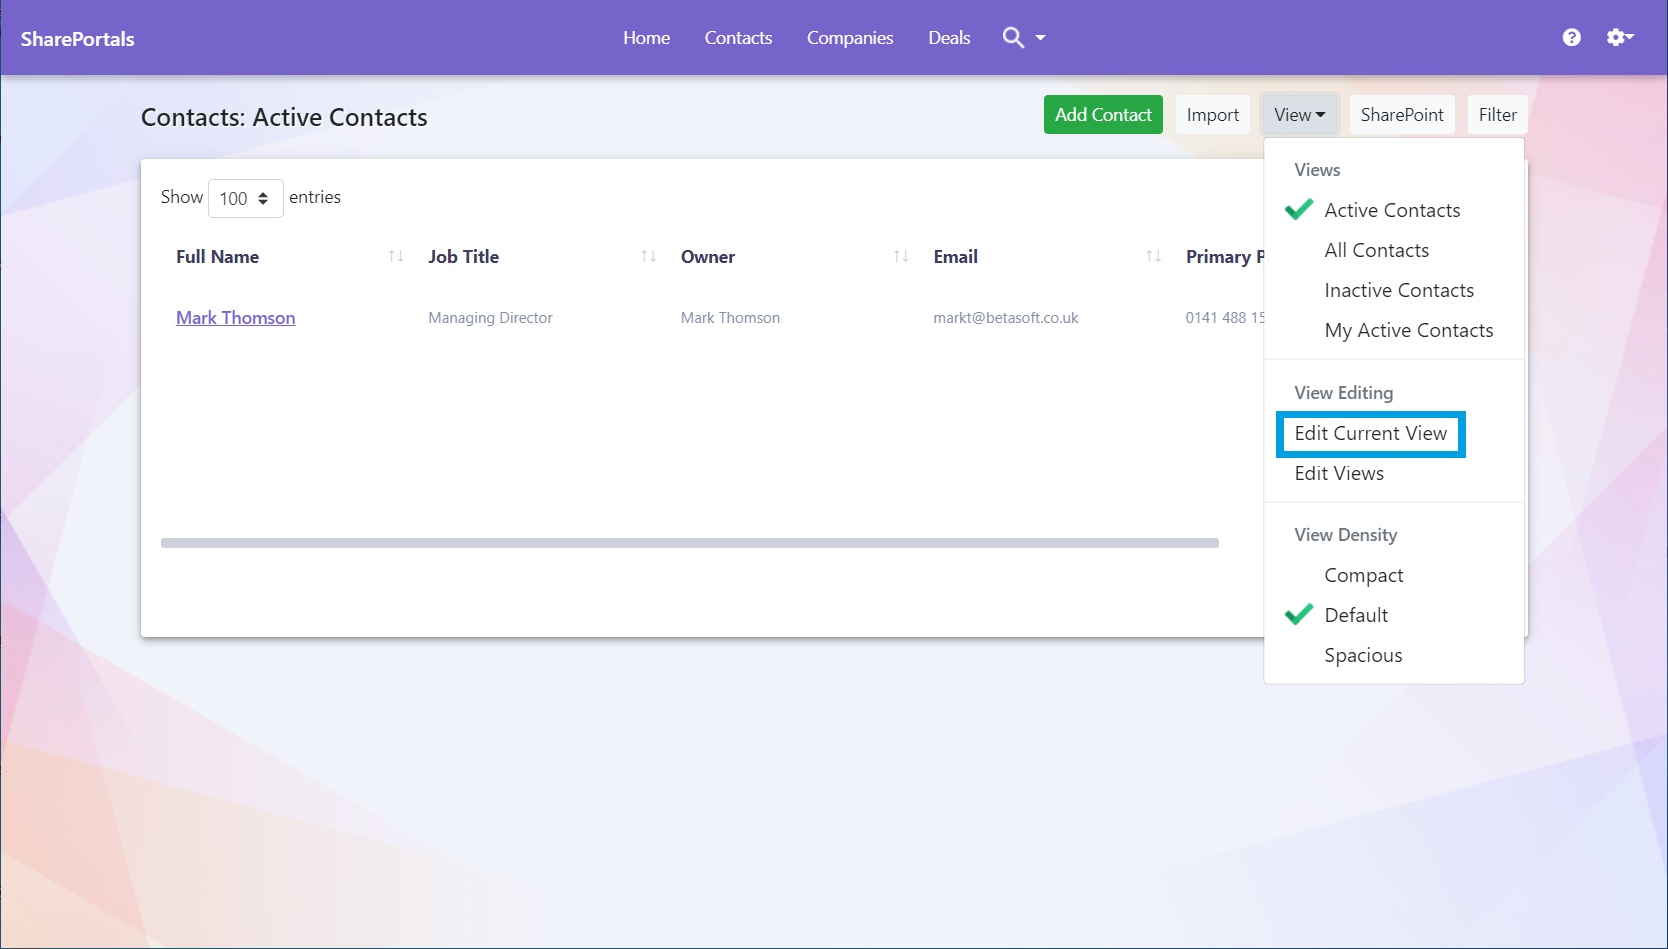
Add, remove or re-order fields for your record summary.
- Navigate to a container in the navigation bar, then click the View button and chose ‘Edit Current View’
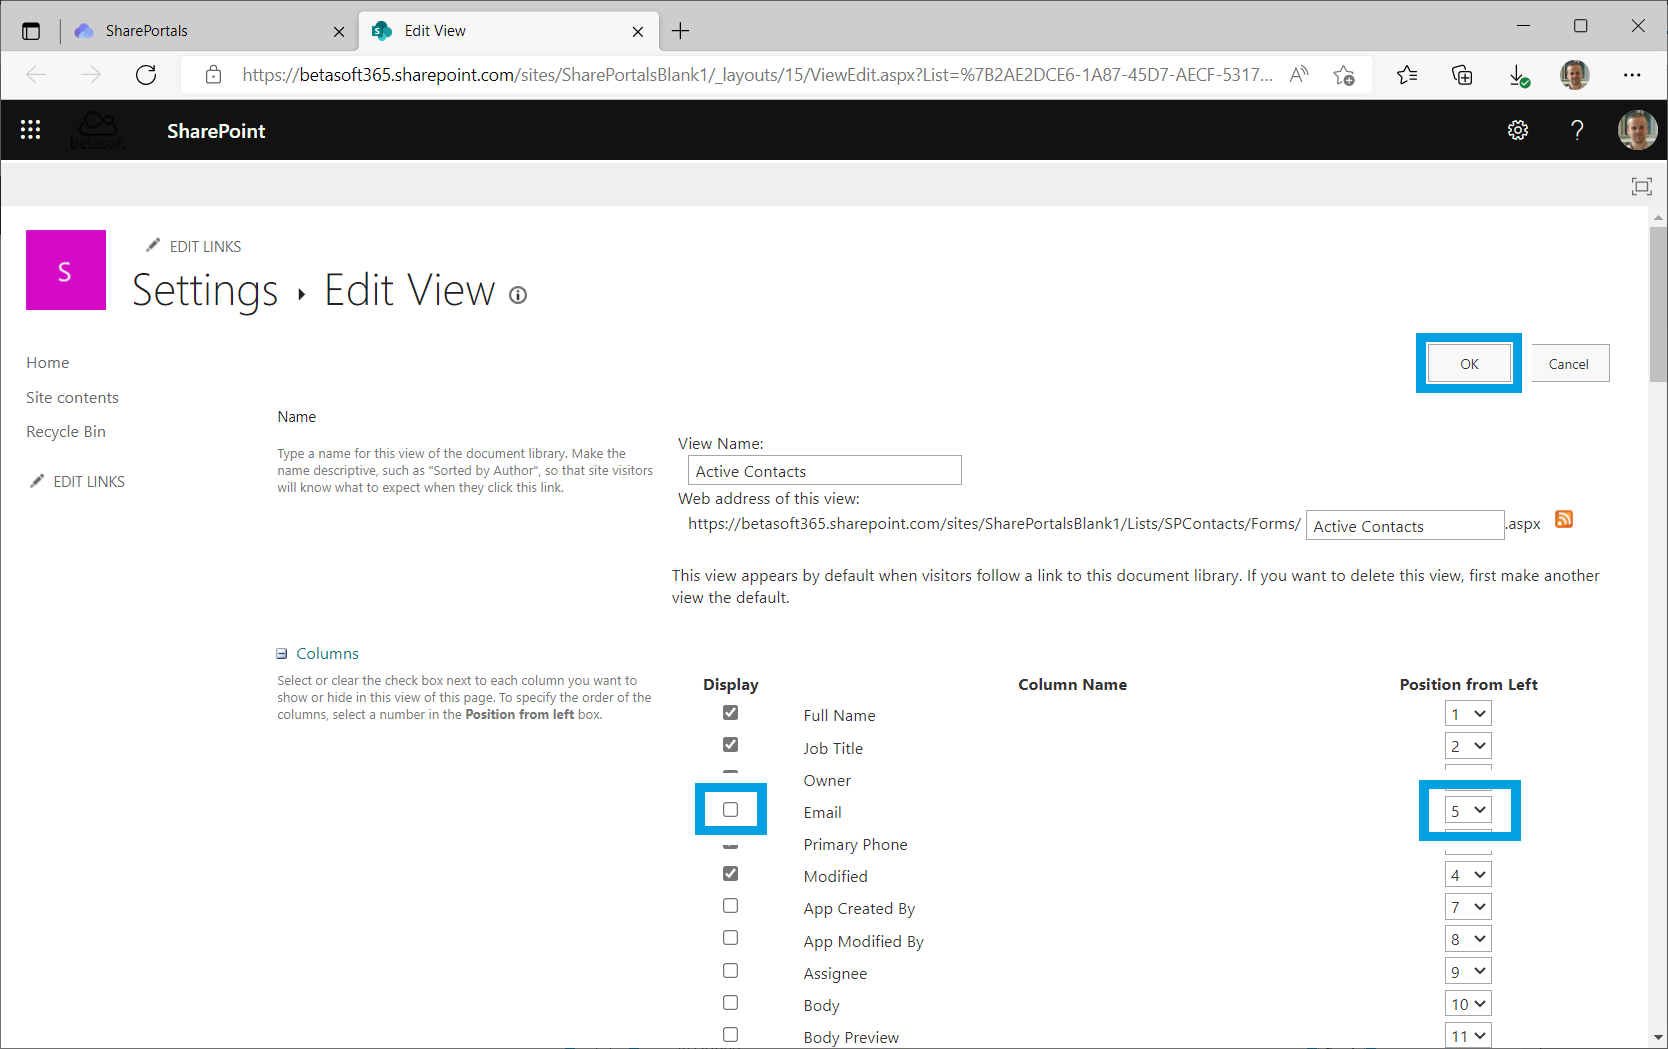
- This takes you to the SharePoint Online site in a separate browser tab. Add and remove fields by using the tick in the 'display column' to the left of the field name. Change the order fields appear in the SharePortals summary by altering the numerical value in the 'Position from Left' column.
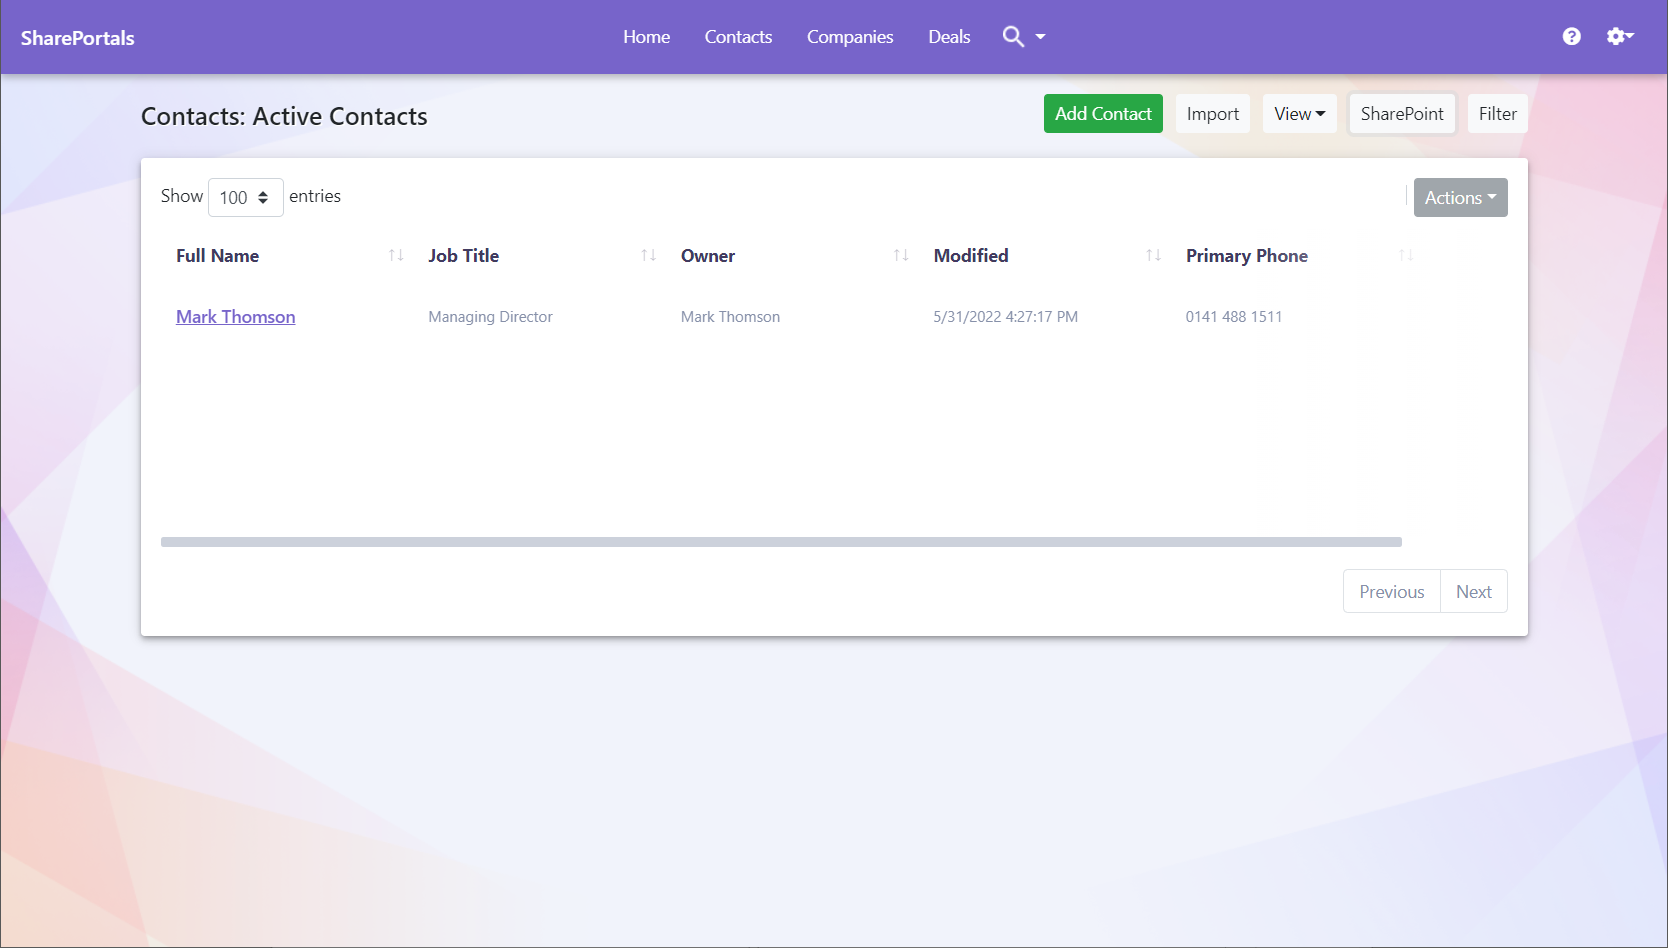
- Click OK at the top to save your changes. Close the browser tab and return to the SharePortals tab. Refresh the browser.
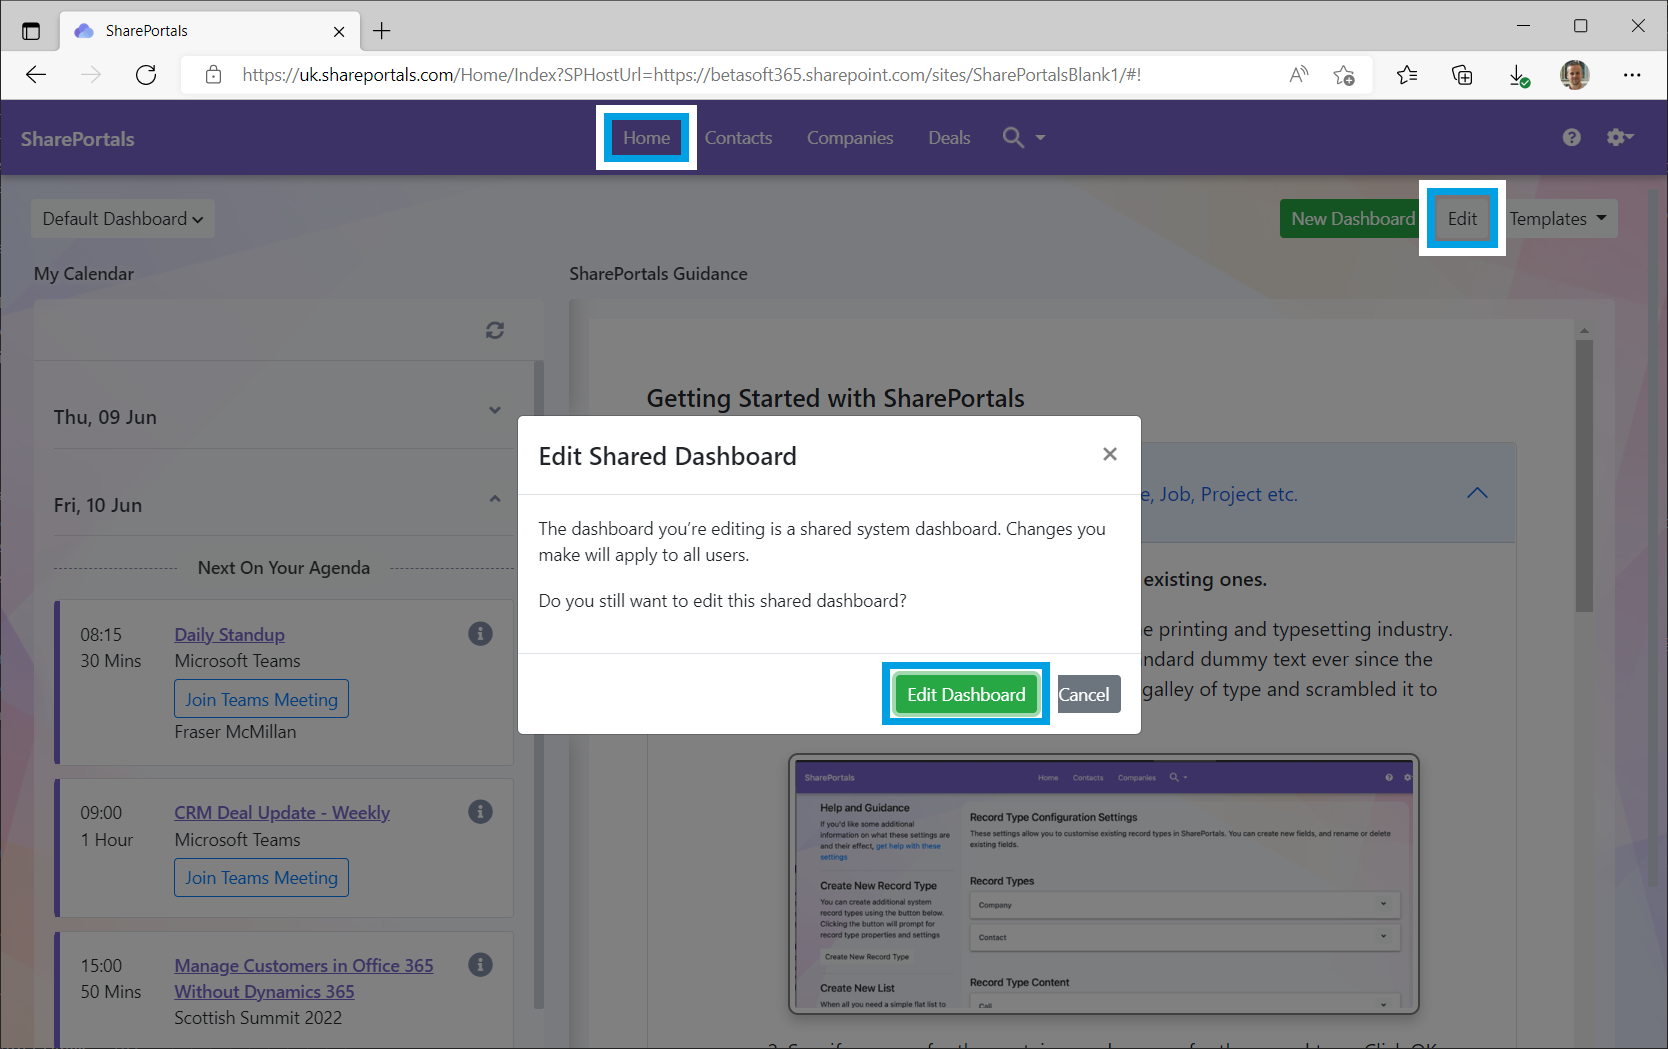
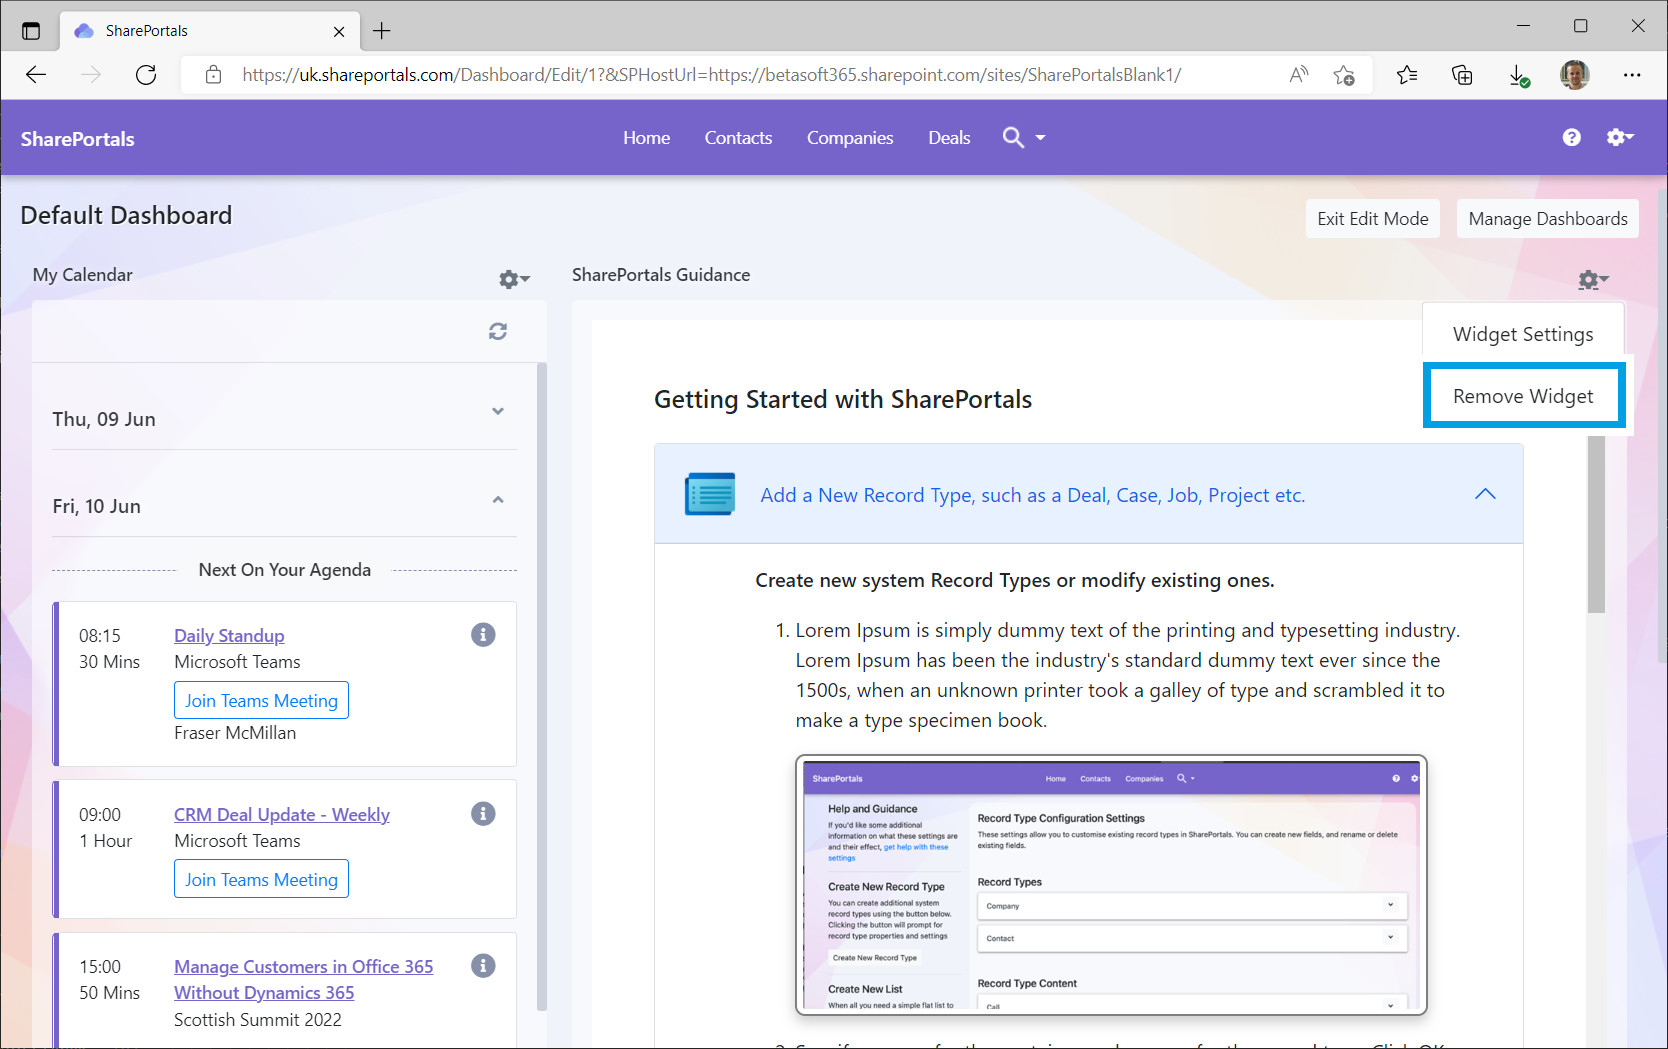
Remove the default widget. Add, remove, or resize dashboard widgets.
- Navigate to your SharePortals Home in the navigation. Select Edit. When you are prompted to confirm you wish to edit the dashboard, select Edit Dashboard.
- Remove a widget by selecting the 'Remove Widget' option from the cog at the top right-hand corner or the widget.
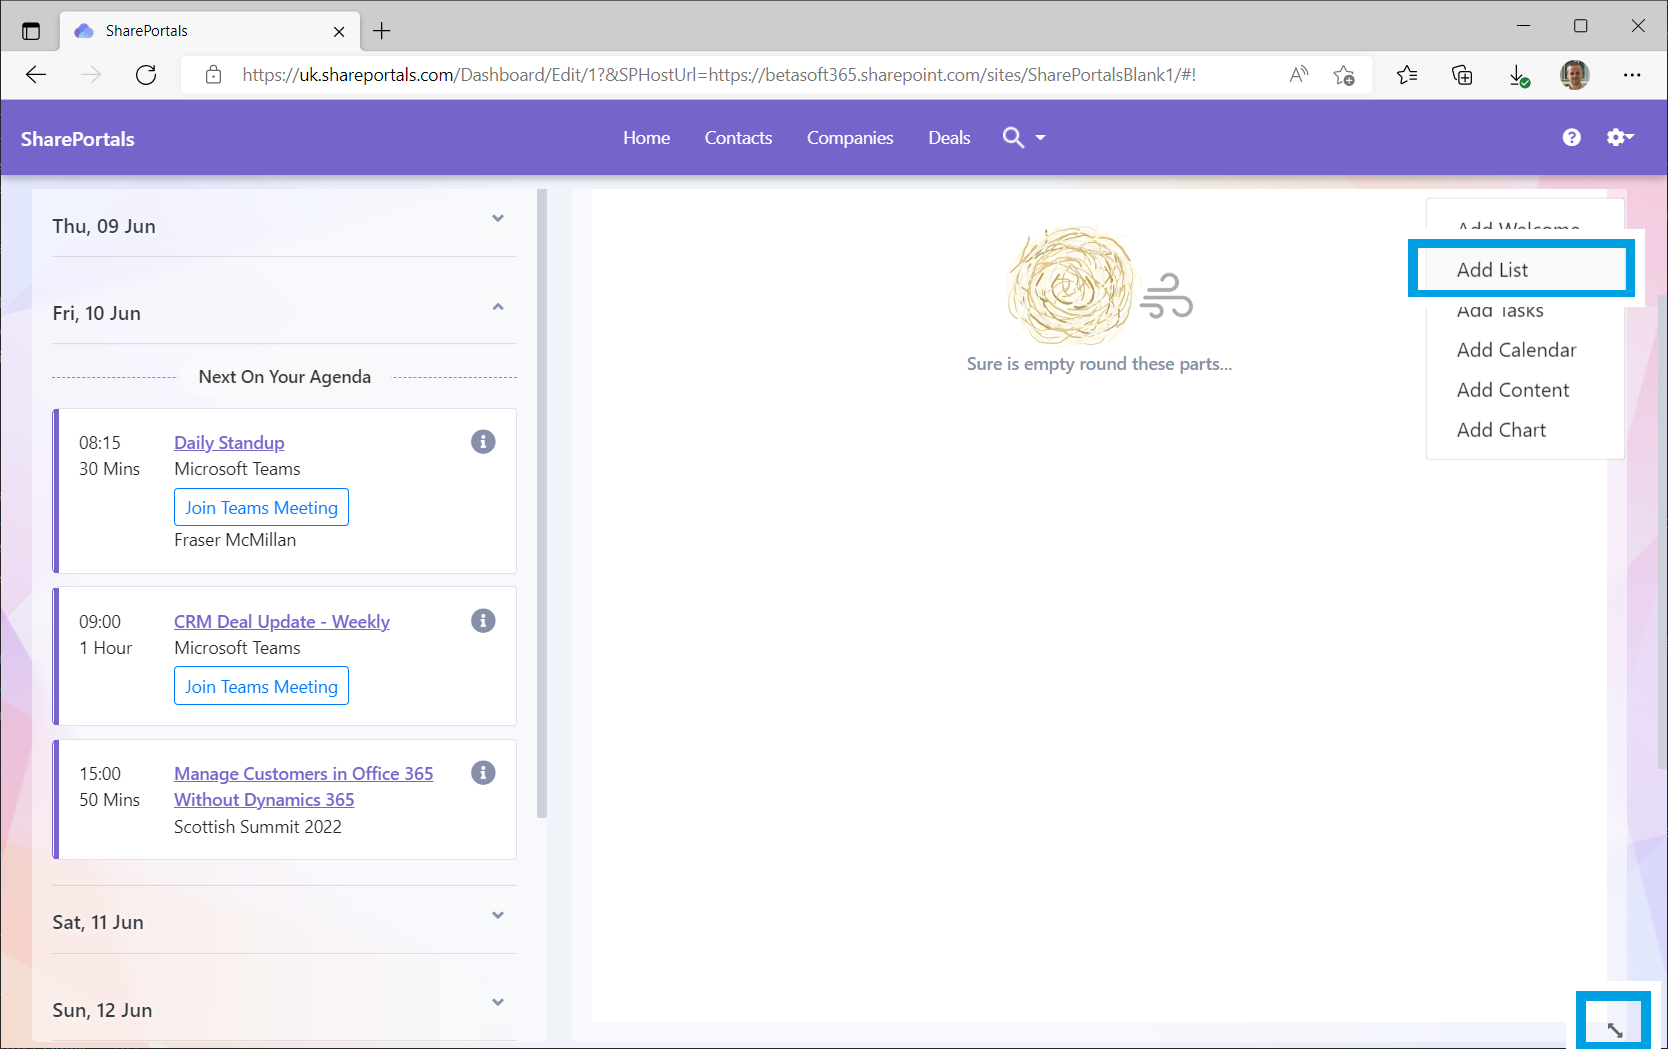
- To resize a widget, drag the bottom right of the widget to your desired size. To add a new widget to an empty placeholder, select the cog at the top right had corner and select the widget type.
- Widget types:
Add Welcome Adds a Welcome widgetAdd List Adds a record listAdd Tasks Adds a list of all open SharePortals tasks currently assigned to youAdd Calendar Adds your Office 365 default Outlook calendar (already on the default dashboard)Add Content Adds external web content via an URLAdd Chart Adds a chart from a list of previously created SharePortals charts
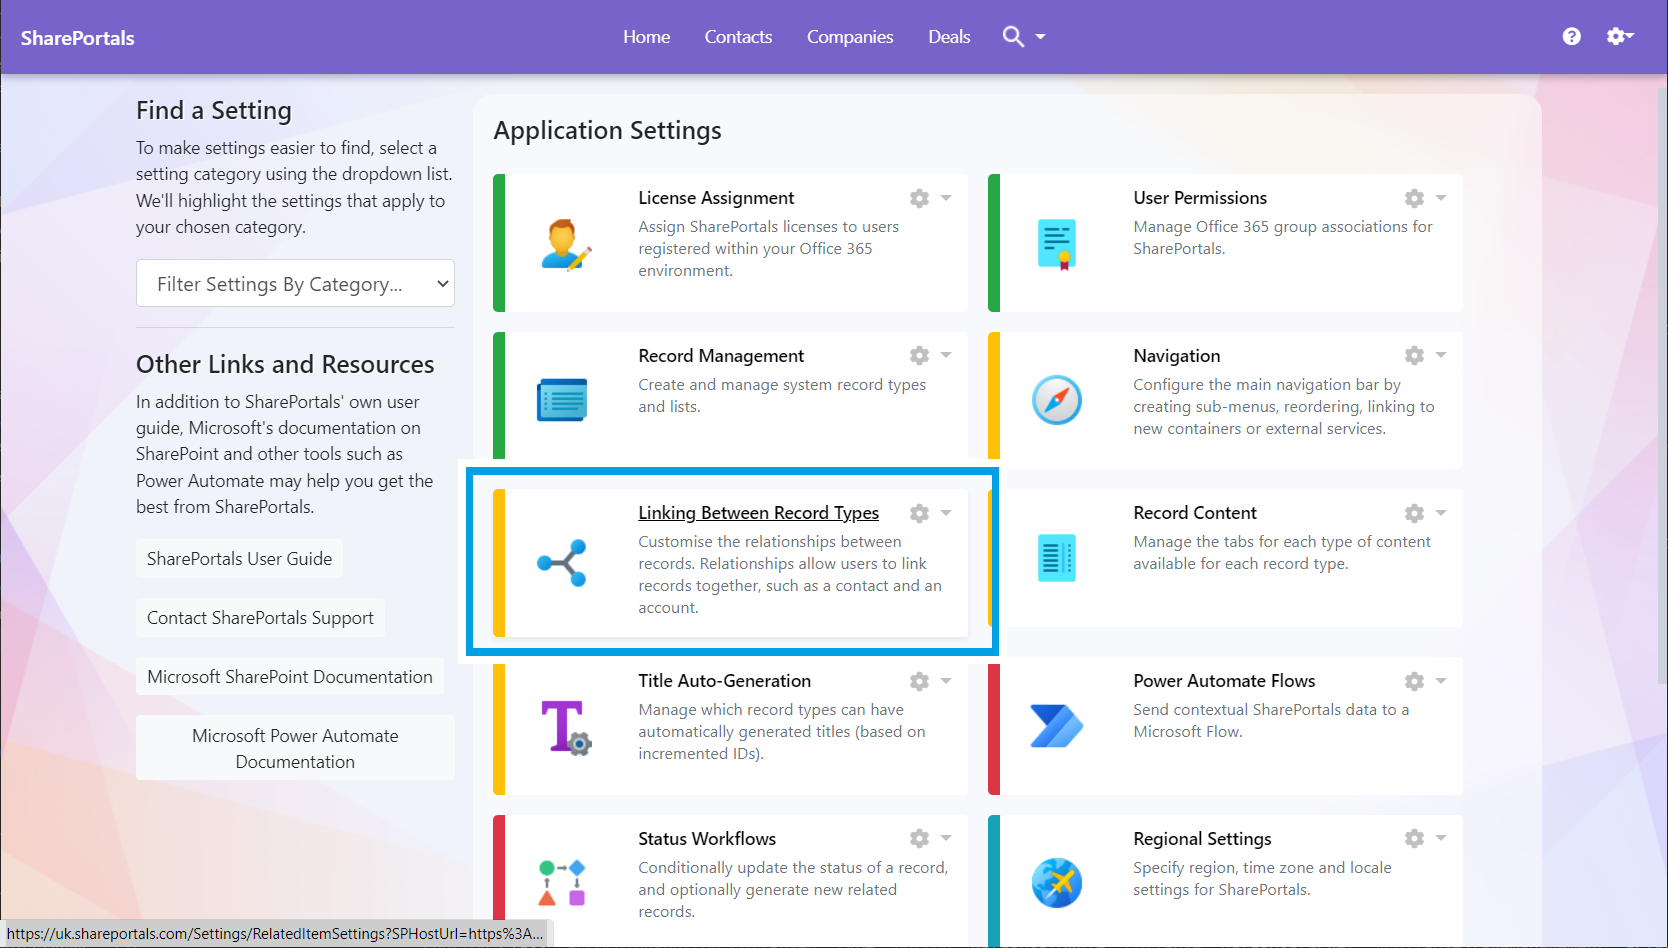
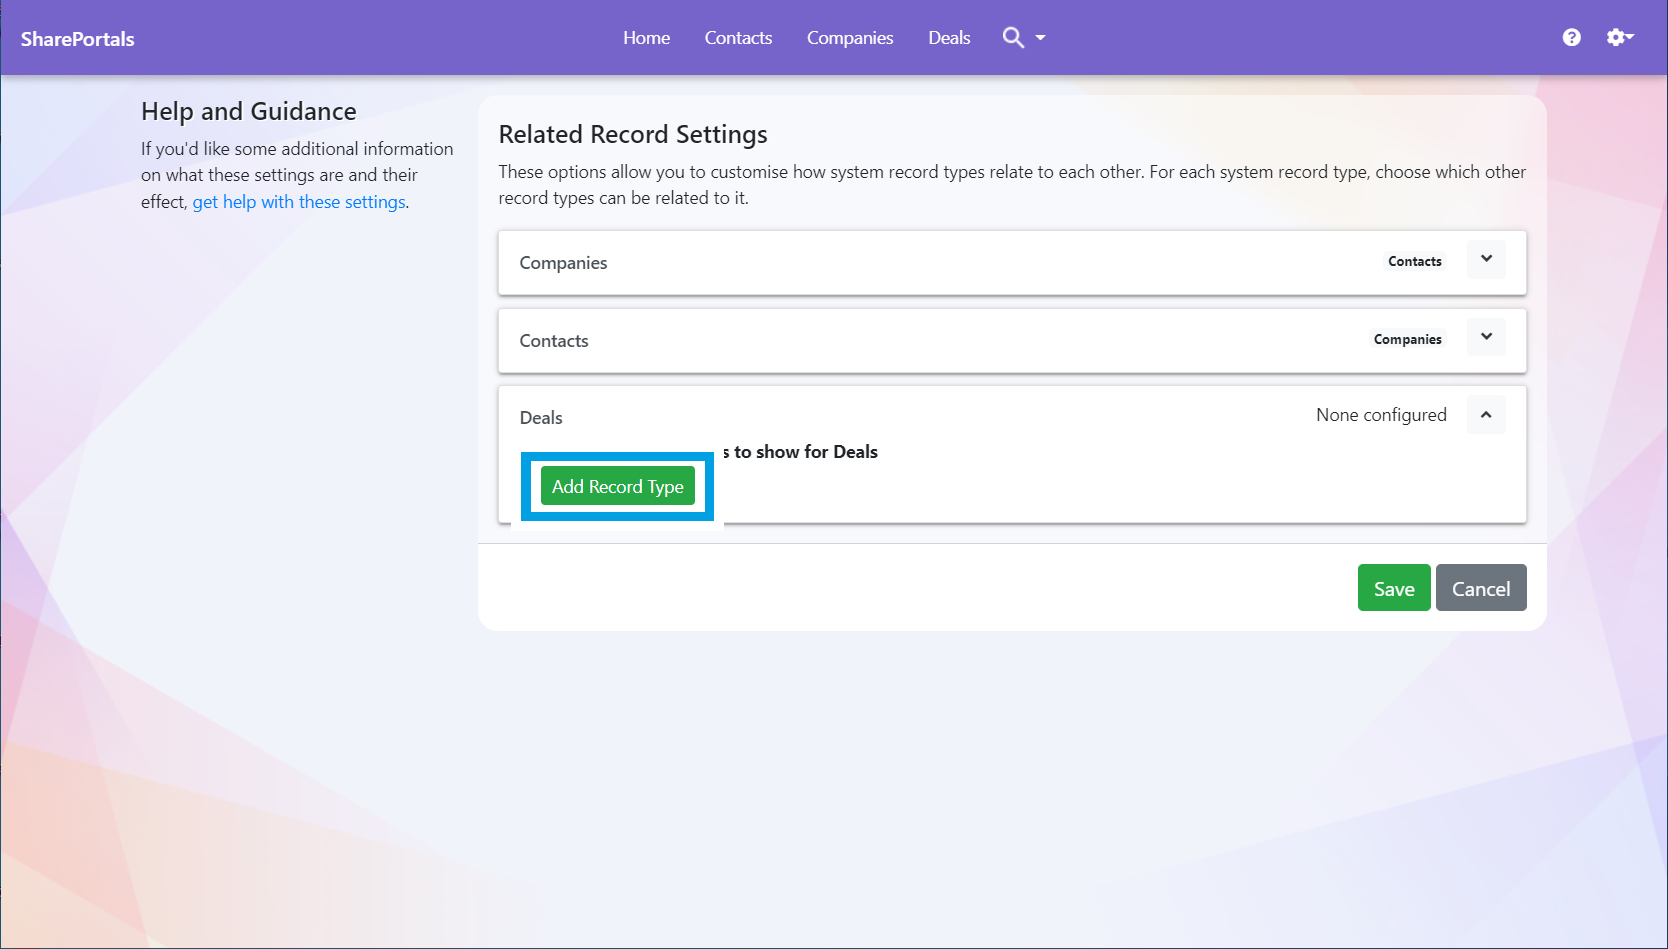
Customise the relationships between records. Relationships allow you to link records of different types for easy reference.
- Go to SharePortals | Application Settings | Linking Between Record Types
- Expand the new Record Type carousel and select Add New Record Type
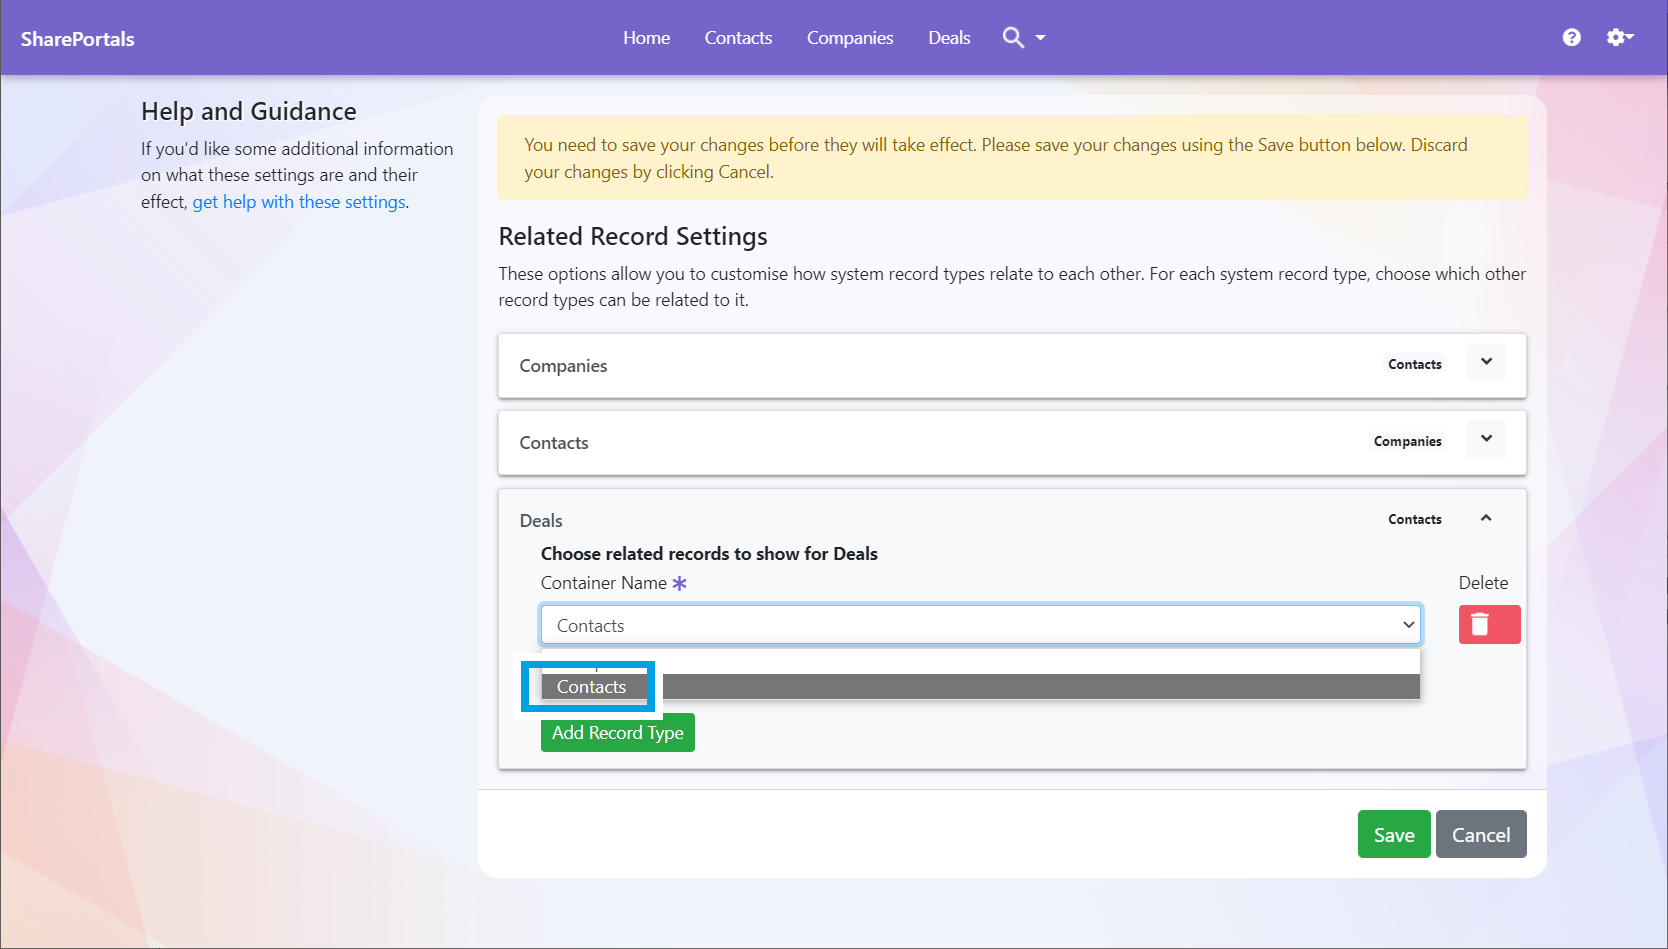
- Choose from the list of existing record types and click Save:
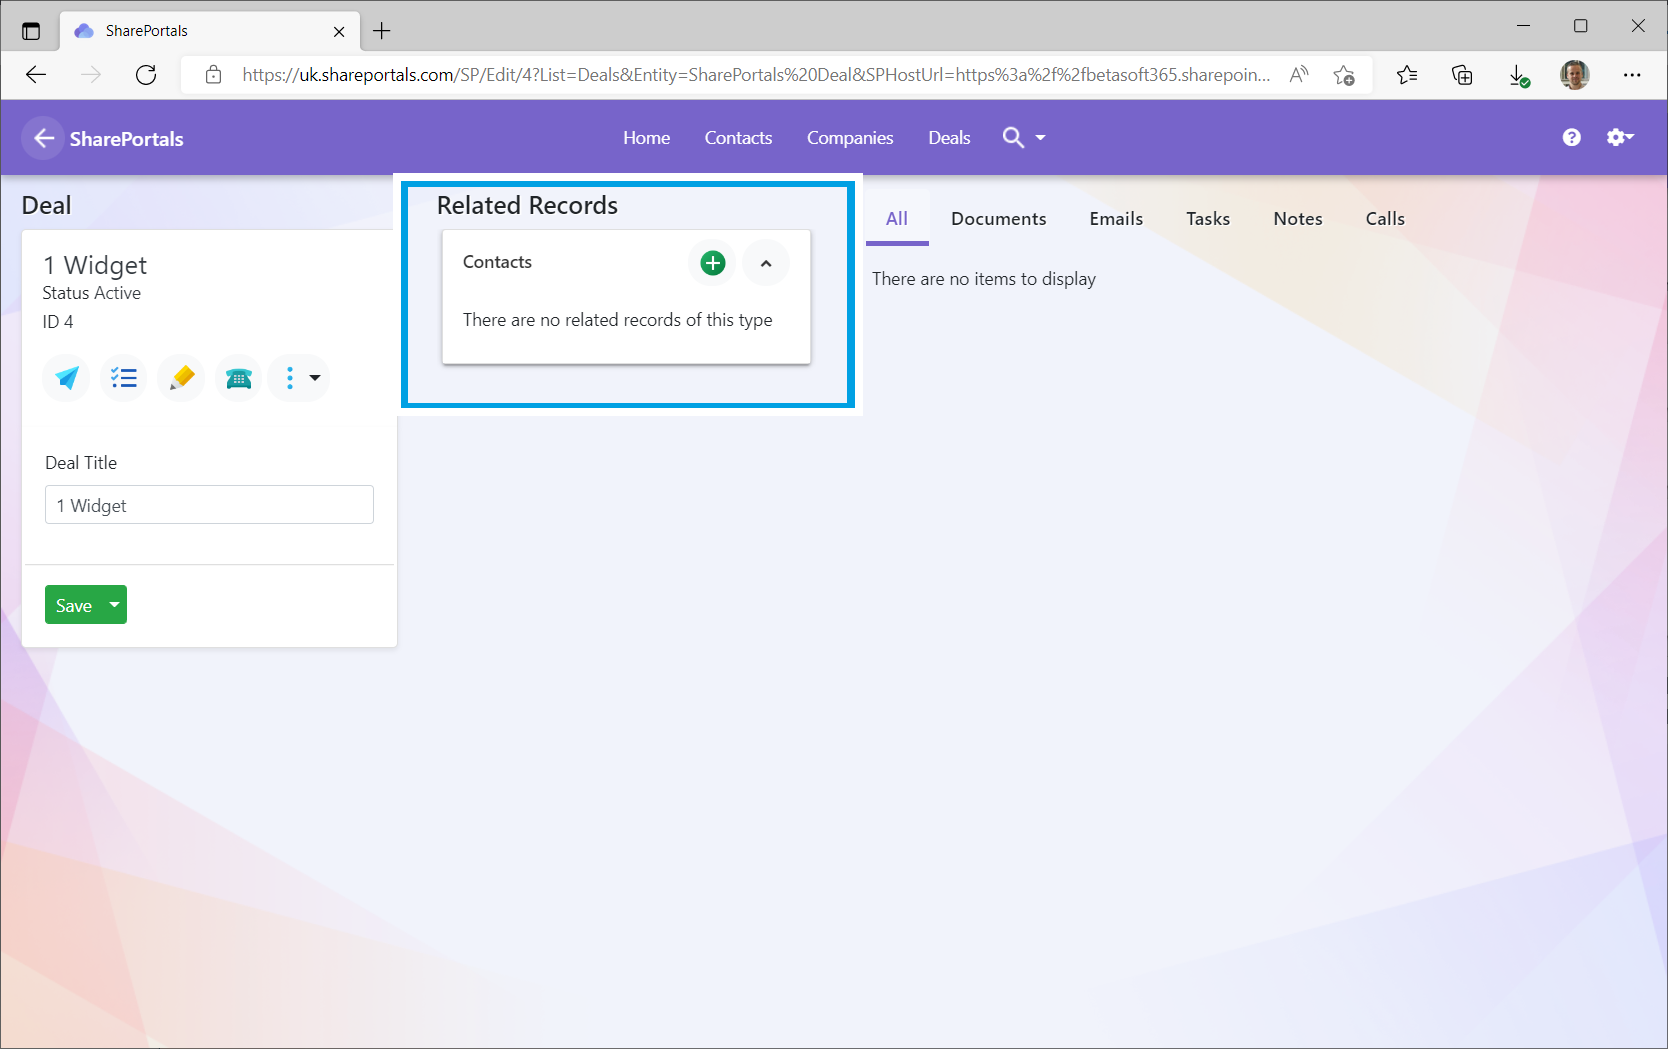
- Navigate to the new record summary list and open a record. You should now see a related record panel.
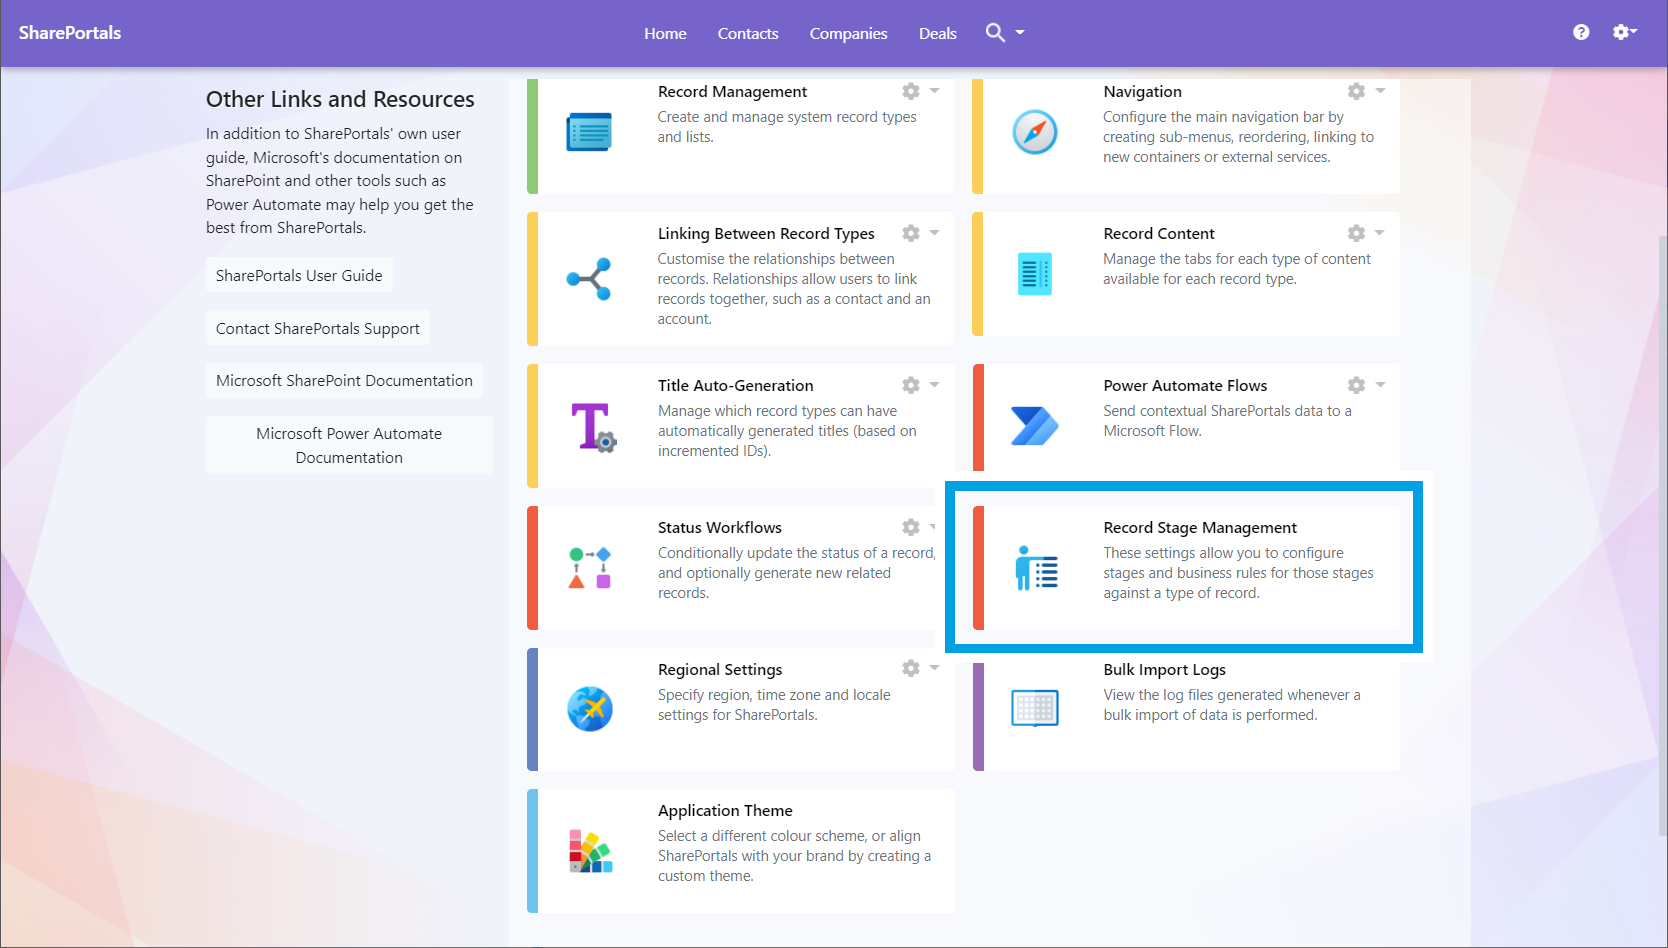
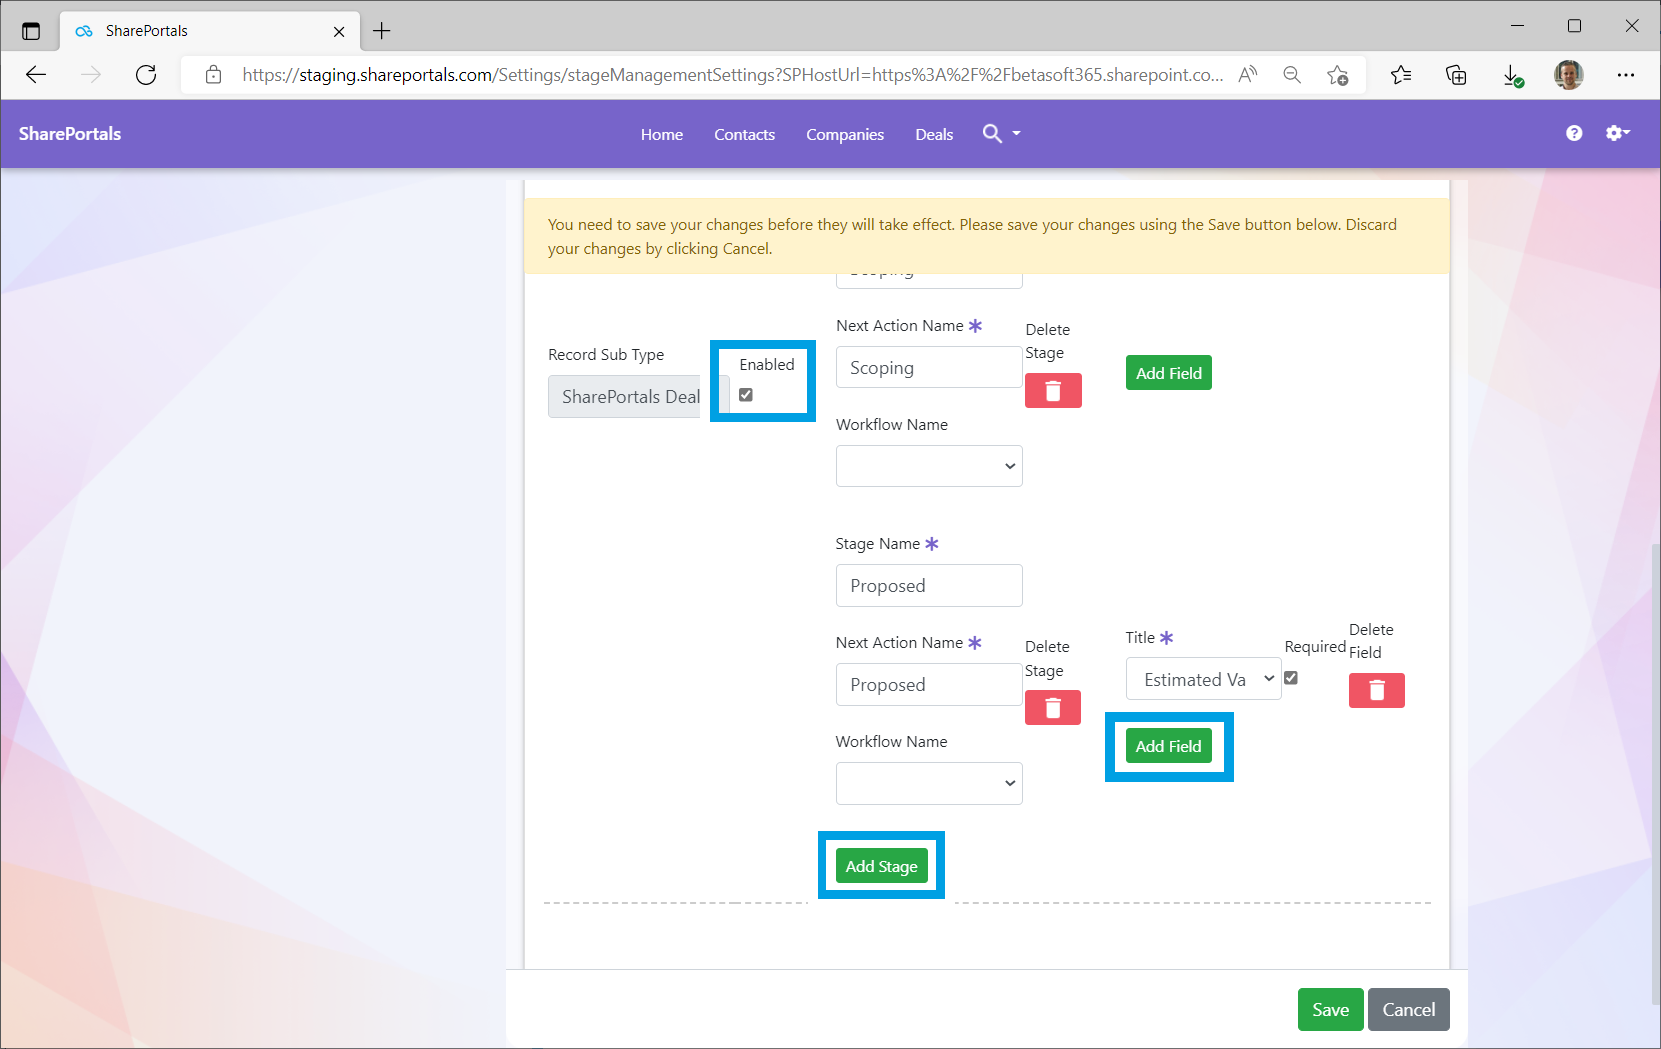
Add Stages to your Records for Record Lifecyle control. Optionally set fields to be requested and workflows to run at certain stages
- Go to SharePortals | Application Settings | Record Stage Management
- Choose a Record Type. Click the 'Enabled' checkbox to turn on stages for the record type. Click the 'Add Stage' button to add one or more stages. Click "Add Field" to add one or more fields
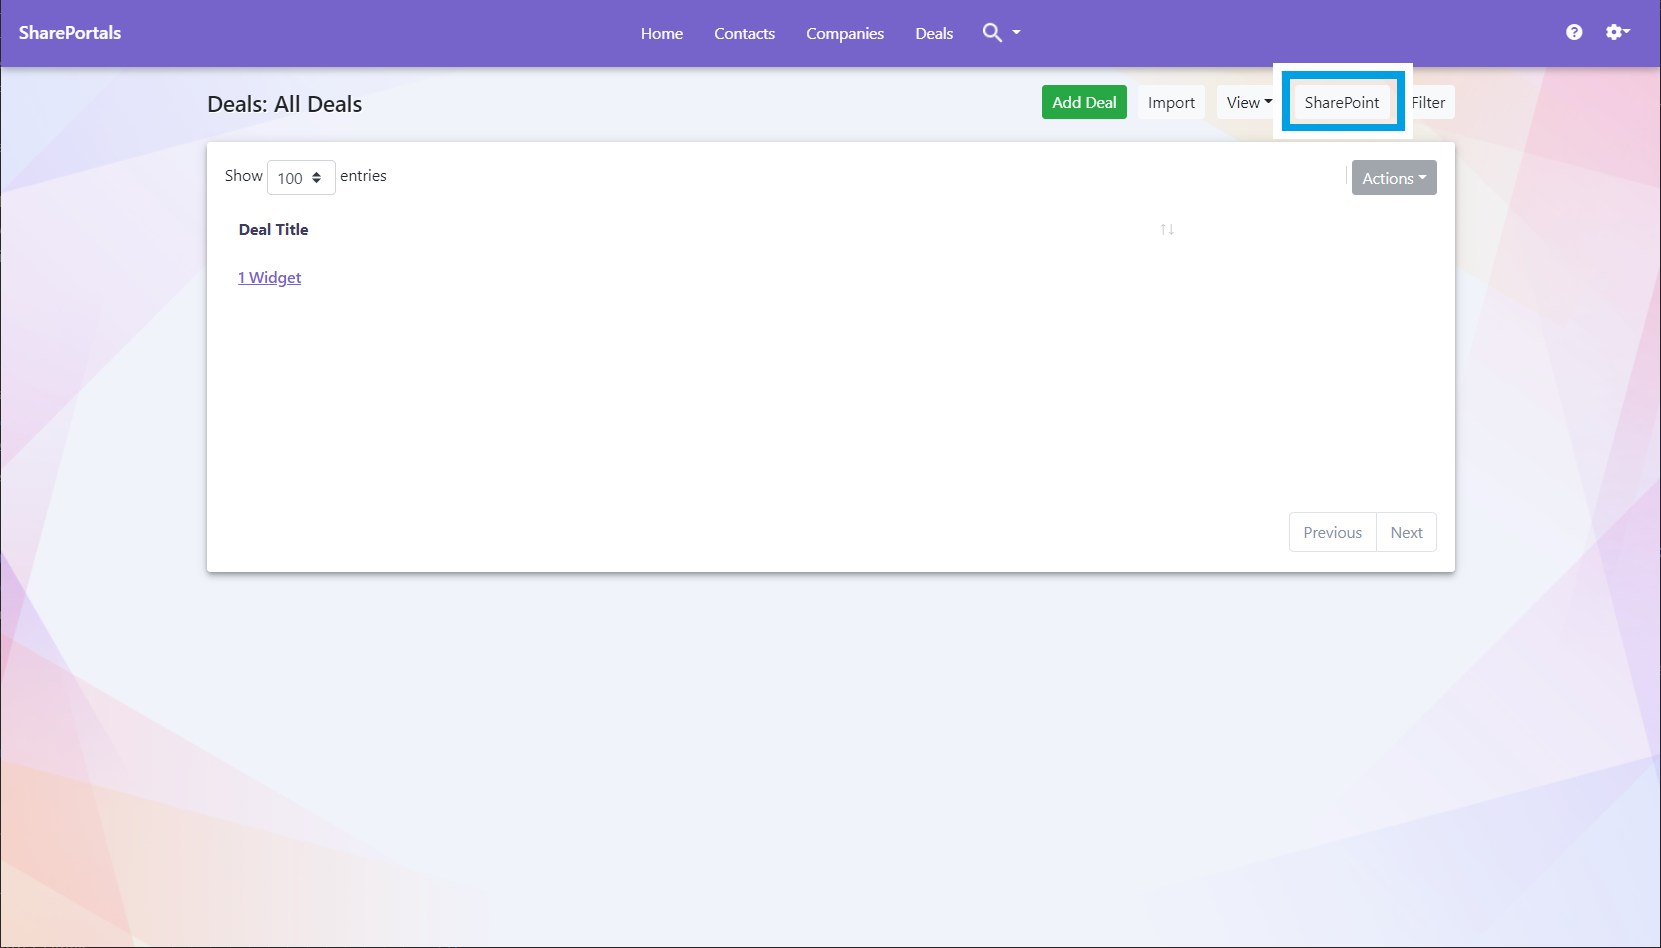
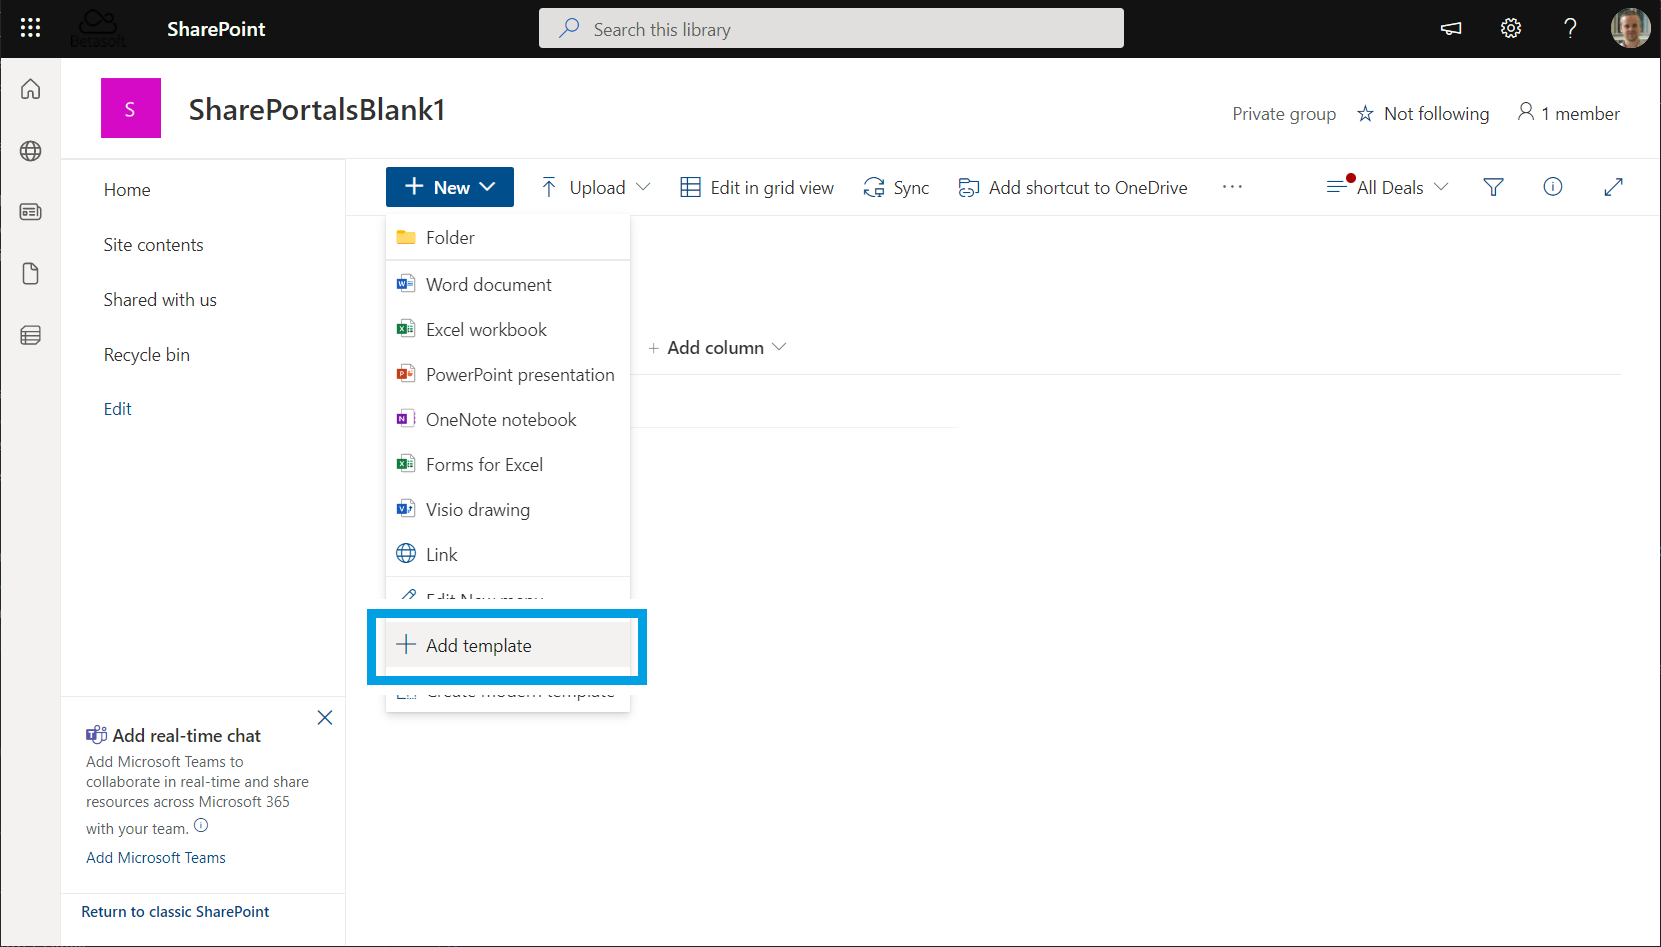
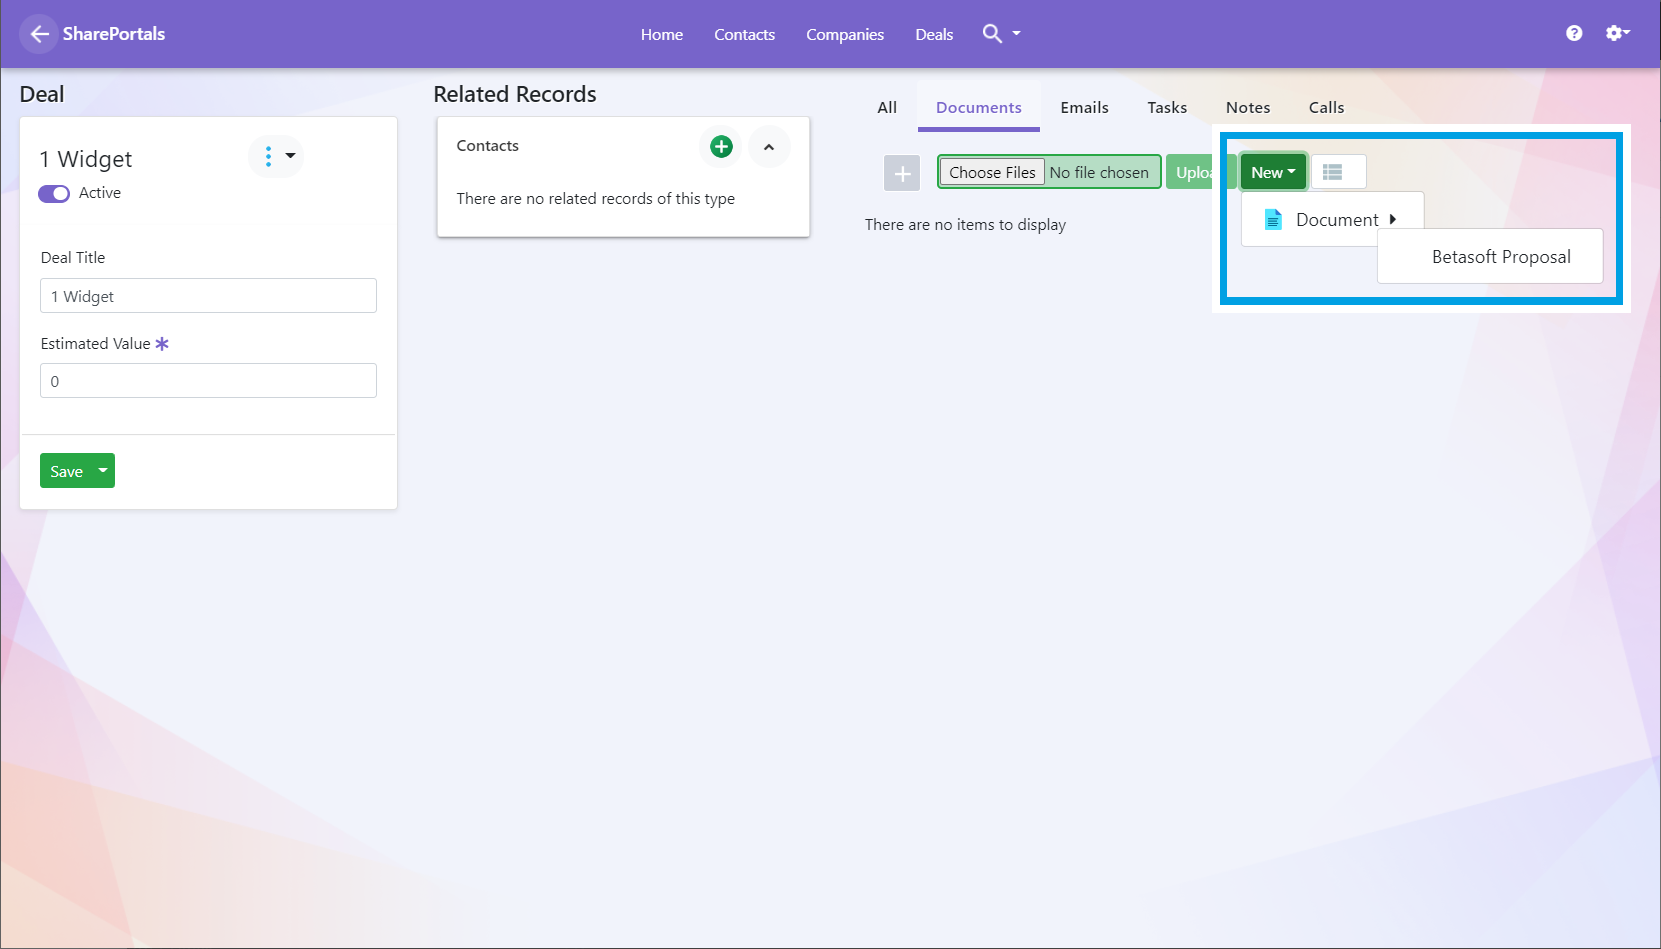
Create and link Office Document Templates to a Container
- Open a Container in the SharePortals navigation Click on ‘SharePoint’ button
- This takes you to the underlying SharePoint library for the container in a new tab. Select ''+ New’ and then ‘+ Add template’
- Upload a document you wish to use as a template within the container. Close the SharePoint tab and return to SharePortals. Open a record and verify you can add a new document template.
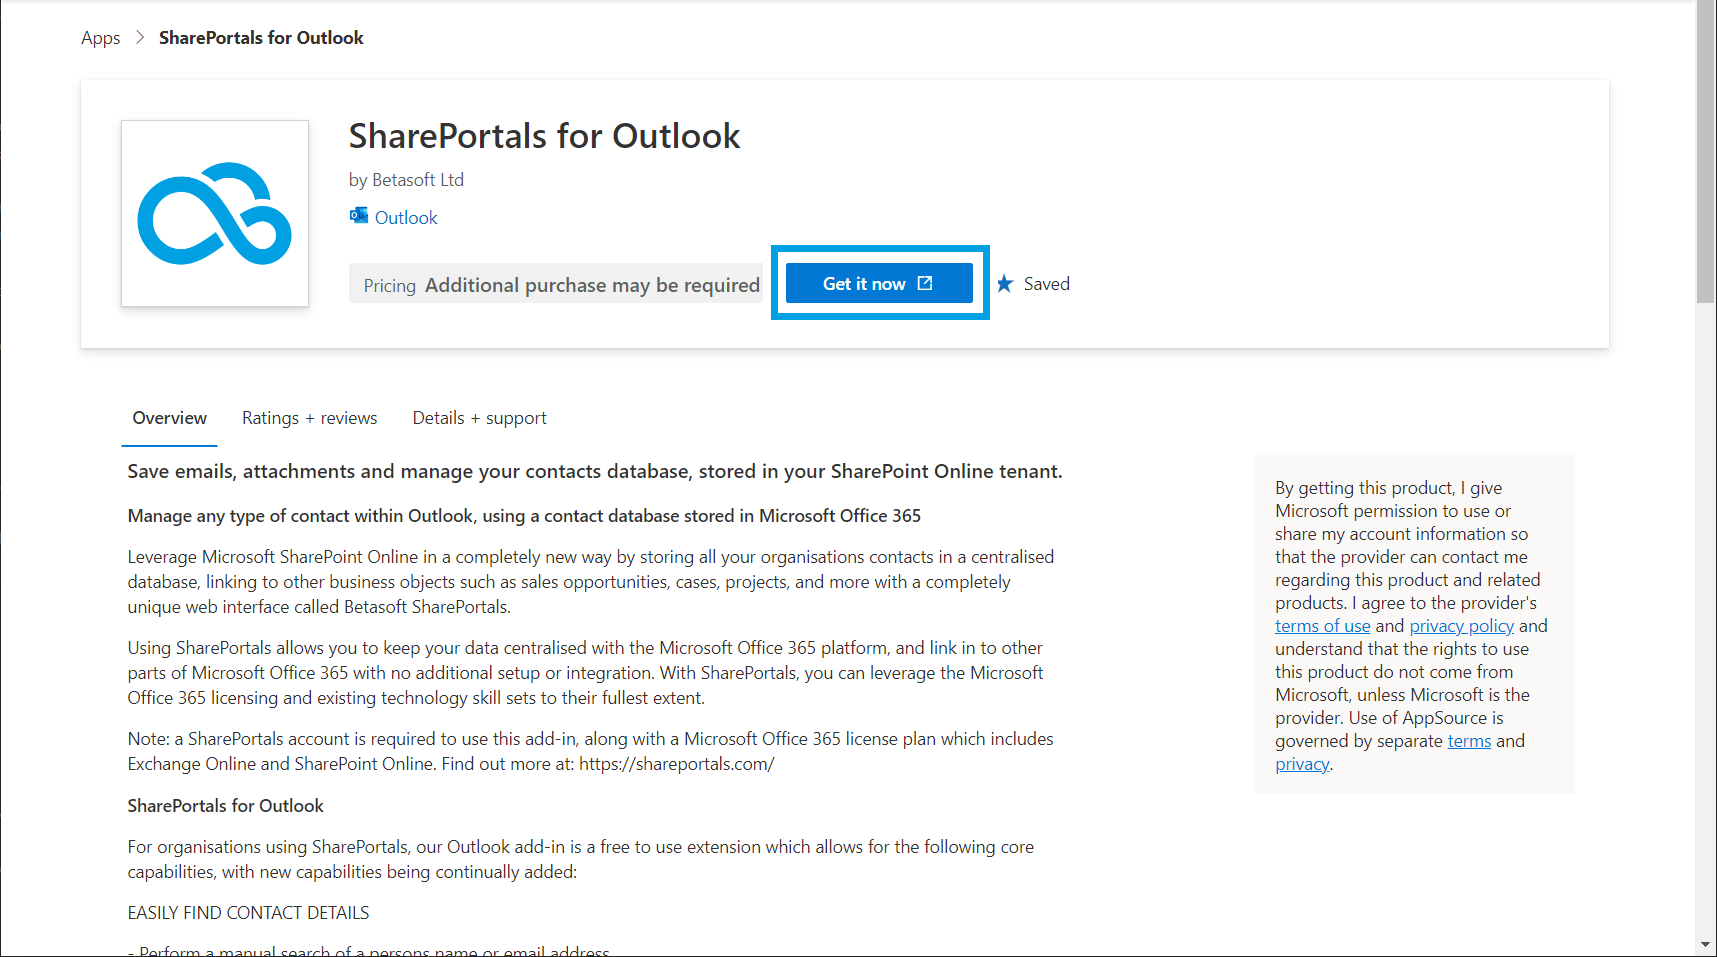
Use SharePortals for Outlook to manage contacts and related records
- go to SharePortals for Outlook on Microsoft AppSource and click 'Get it Now' to install on your Outlook clients
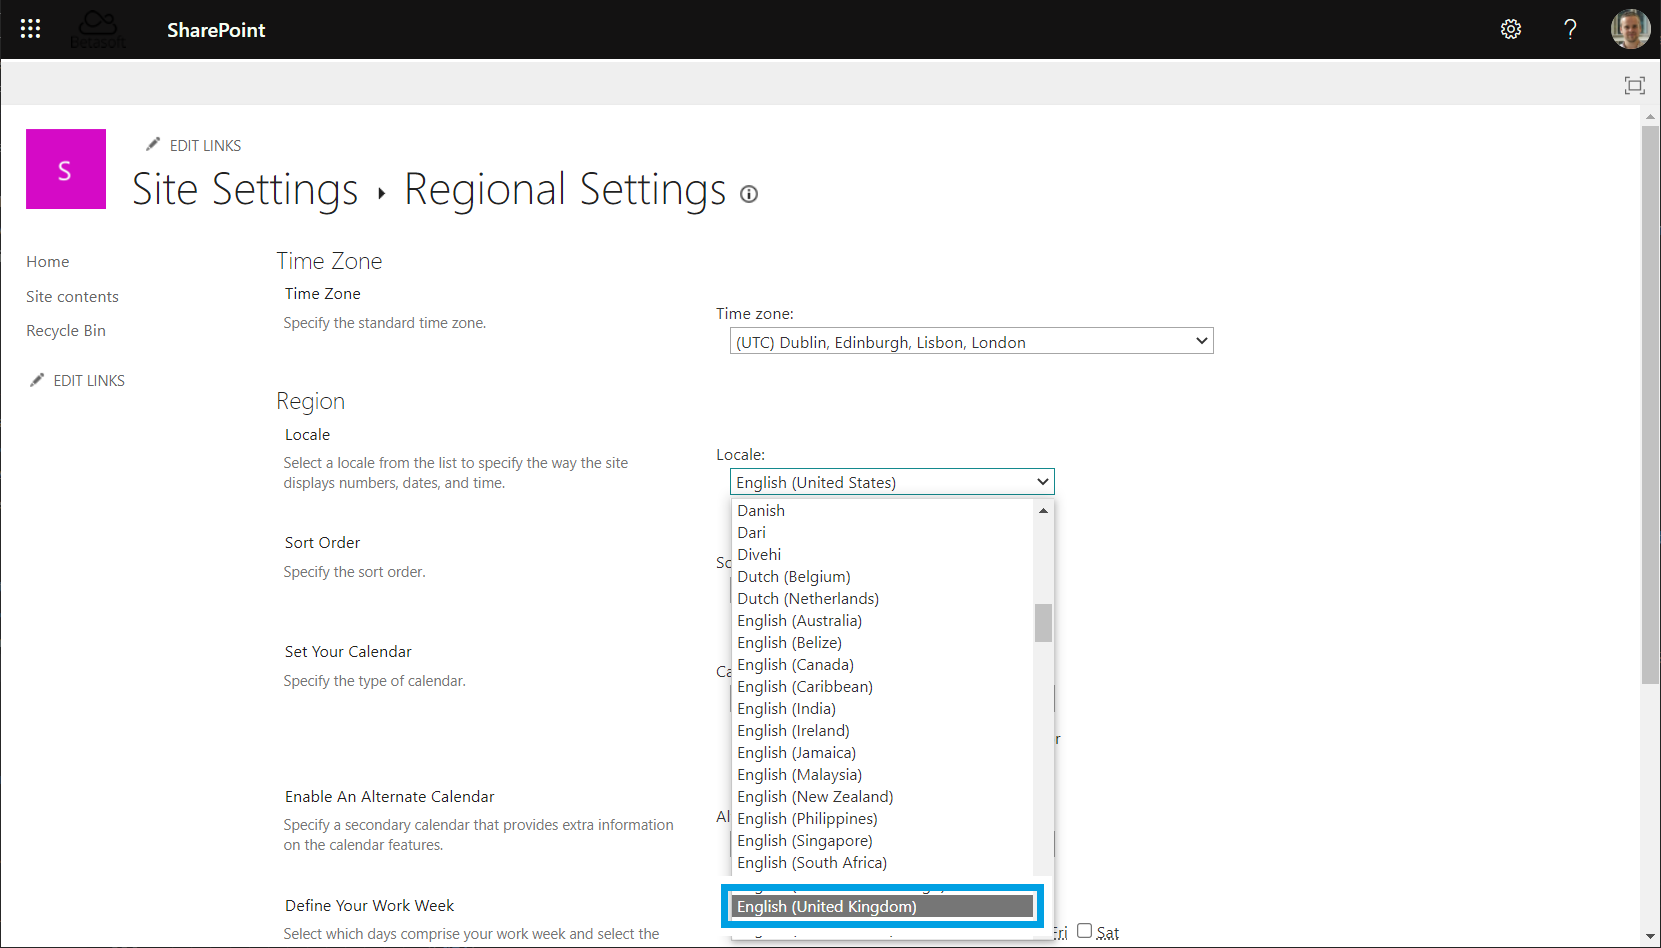
Set your region in the SharePoint site for correct currency and date formats in SharePortals
- Go to: SharePortals | Application Settings | Regional Settings. This takes you to the associated SharePoint site region settings in a new tab
- Change your region to UK, click OK, then close the tab and go back to SharePortals

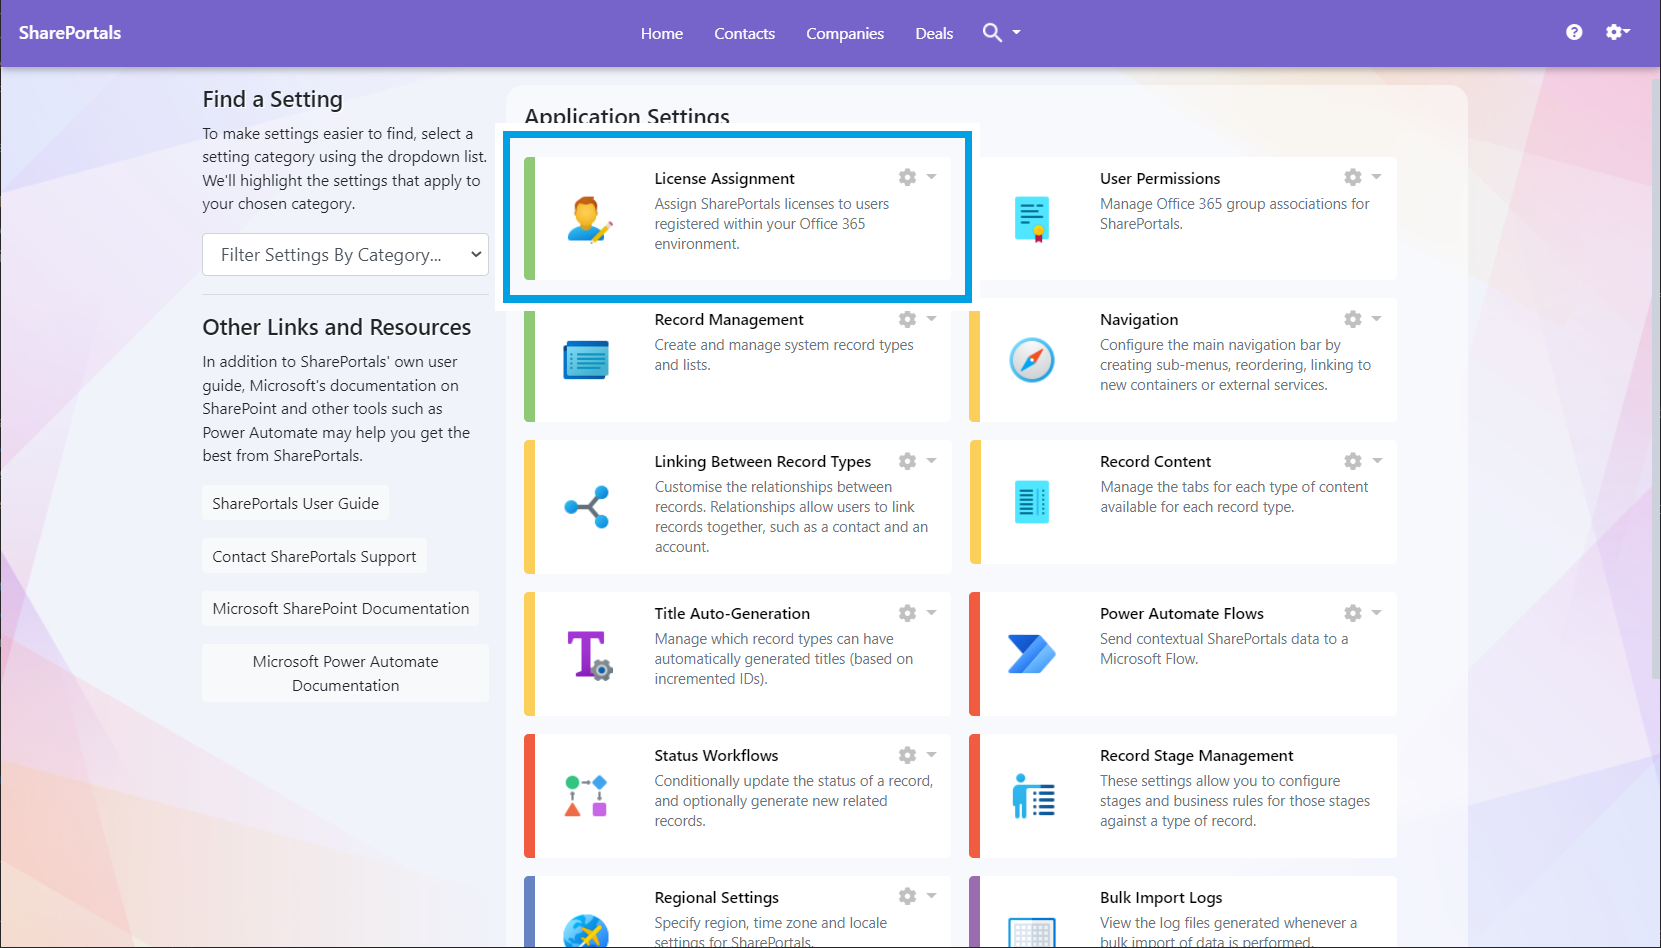
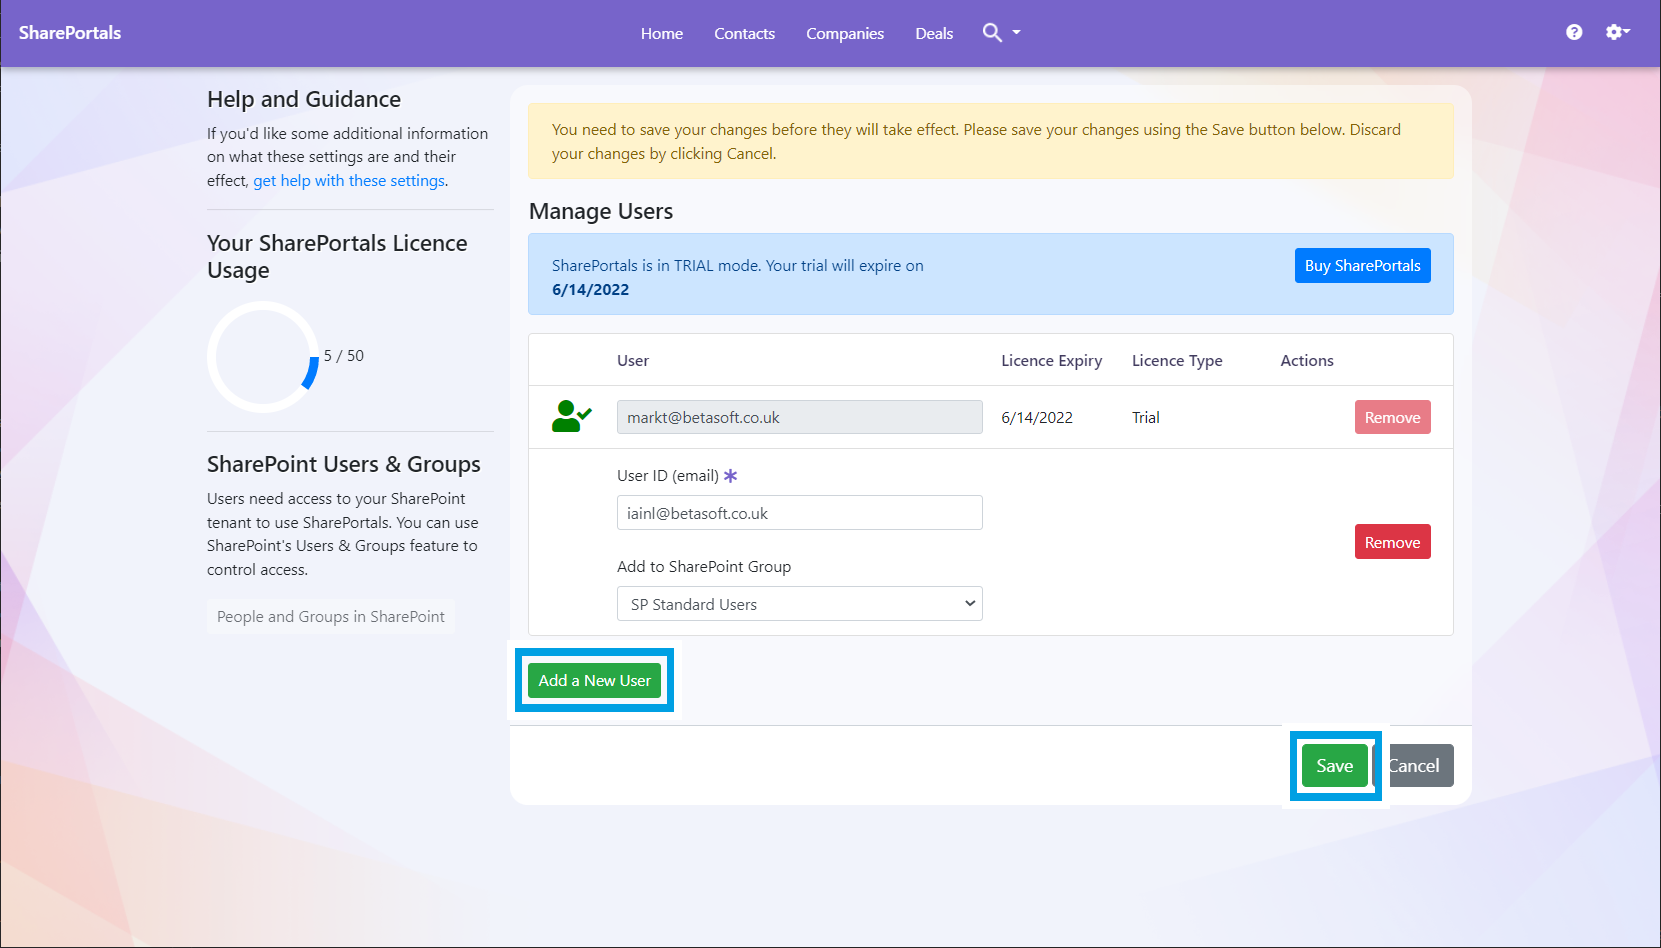
Assign SharePortals licenses to users registered within your Office 365 environment with a SharePoint license
- Go to SharePortals | Application Settings | License Assignment
- Enter the email address of a valid user, select the most appropriate permissions group, and then click Save.